Did it ever occur to you that you deleted a file permanently on your computer only to find that it was very important and you probably want to get it back? Now comes to your rescue is Data Recovery software. Data Recovery software scans your drives and helps you to recover data.
When you delete a file on your computer, it does not actually get deleted in real sense. Once data has been stored on a drive, it cannot be removed unless you overwrite it with some other data. So the faster you realize that you have deleted important files, the more the chances are for recovery.
Among such recovery software is Do Your Data Recovery. In this post, we are going to have a look at how the application works, what are its features, and whether it is worth it or not.
Features
- Quick Scan – Looks for recently deleted data and performs speedy scanning of the drive you have selected.
- Advanced Recovery Scan – Scans the hard drive deeply to recover all kinds of deleted data. This option can be used if the deleted files turn out to be corrupt or damaged.
- Supported File Formats – Can recover all types of lost data, including photos, videos, emails, audio, documents, folders, archives, etc.
- Supported File Systems – Can recover data from NTFS/+, FAT 12/16/32, exFAT, EXT 2/3/4, and other file systems.
- Preview before purchase– The free trial version allows you to scan your computer completely and preview the files that can be recovered before you decide to purchase the software and perform the actual recovery process.
- Import/Export Data Recovery Results – Once your data is recovered successfully, you can also import and export that data for your reference or your organization’s need.
How to Use Do Your Data Recovery
Installing
- The installing process is quite simple. Just head over to Do Your Data’s official website and choose your operating system. We are reviewing the Windows version.
- Then click on Free Trial, and the download will begin automatically. You can also choose to buy the software here, but we recommend previewing your files before purchasing.
- Install, run the application, and give it access to your hard drive and you are all set!
Scanning
Once you open the application, the home screen lists all your partitions in a clean format. If you know which drive had your data you want to recover, you can choose that partition over here. On the bottom right, there is also an option to select the file types you want to search for. If you just want to recover photos, you can deselect all other options, excluding photos. It will ensure the scan is faster since the application is now looking only for a particular file type.
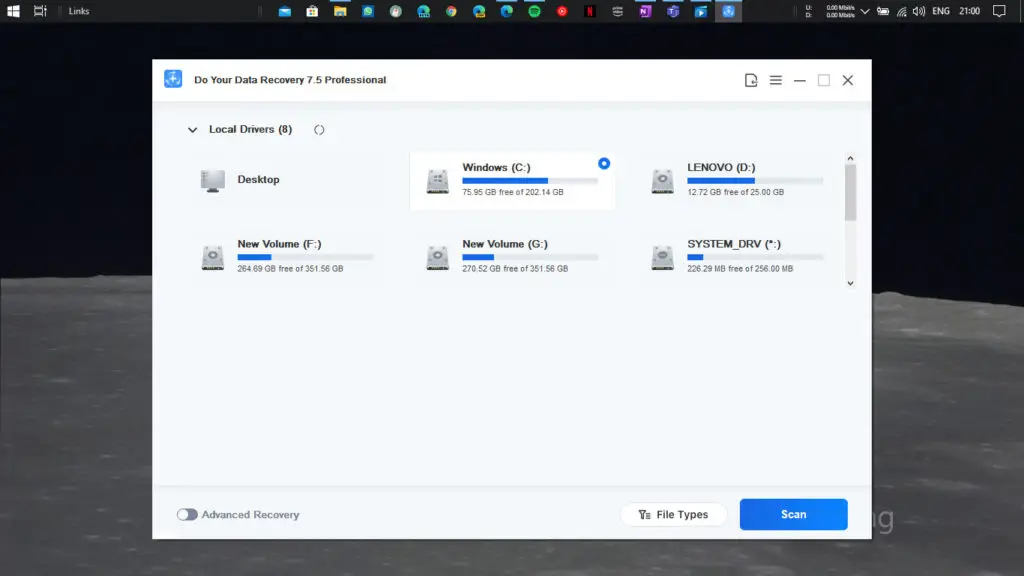
Besides that is the scan option. By default, this scan button runs the “Quick Scan’ feature. The application will quickly scan for recently deleted files, the Recycle Bin, and other locations even if you shift deleted the files. In our test, the quick scan took just a couple of seconds to scan a 350 GB partition of our hard drive.
However, if you think you have permanently deleted the file or the file is corrupt or damaged, you can select the ‘Advanced Recovery” option on the bottom left and perform the scan again. Advanced Recovery scan can also be applied to search for specific file types. Make sure you select what file type you are looking for since the advanced recovery takes a long time as compared to Quick Scan as it digs in a lot deeper to search for the files that can be recovered.
Our test revealed that it took a little less than two hours to scan a 350 GB partition of our hard disk when we had selected “All file types” for scanning. It will set your expectations accordingly.
You can preview the files while the scanning process is ongoing since it might take a long time to complete the scan. In case you already find the file you want to recover, you can pause the scan and start the recovery process.
Data Recovery
Once the scanning process is finished, you will see the deleted files that can be recovered. Do Your Data allows you to view your files in three formats – Path, (File) Type, and Time. Select your desired format and then check which files you want to recover. If you do not find the file you were looking for, you can use the Advanced Recovery scan option to dig in even deeper to the nooks and corners of your hard drive to check for recoverable files.
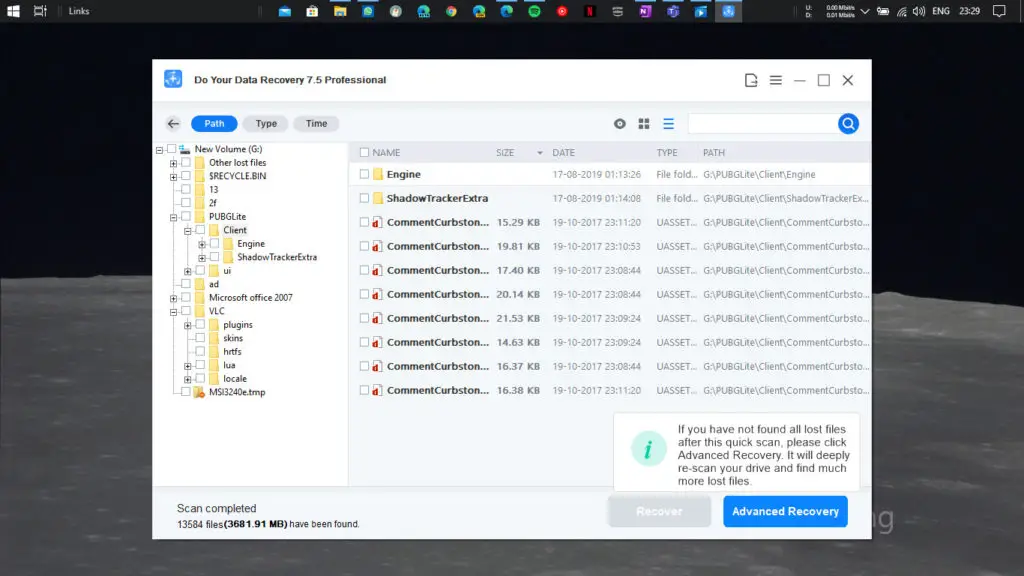
Select the files you want to recover by checking on the option on the left side of the file. Then click on the recover option to recover those files. The restored files will be added to the same directory shown over here, or you can also choose a separate location for the same.
Things you should note before performing the recovery process (via Do Your Data) –
- Don’t save the files on the drive where you lost them, or the new files will overwrite the old files.
- If some files are not found after Quick Recovery, please click ‘Advanced Recovery‘; it takes more time, but find much more lost files.
- During the scanning, you can pause and stop the process.
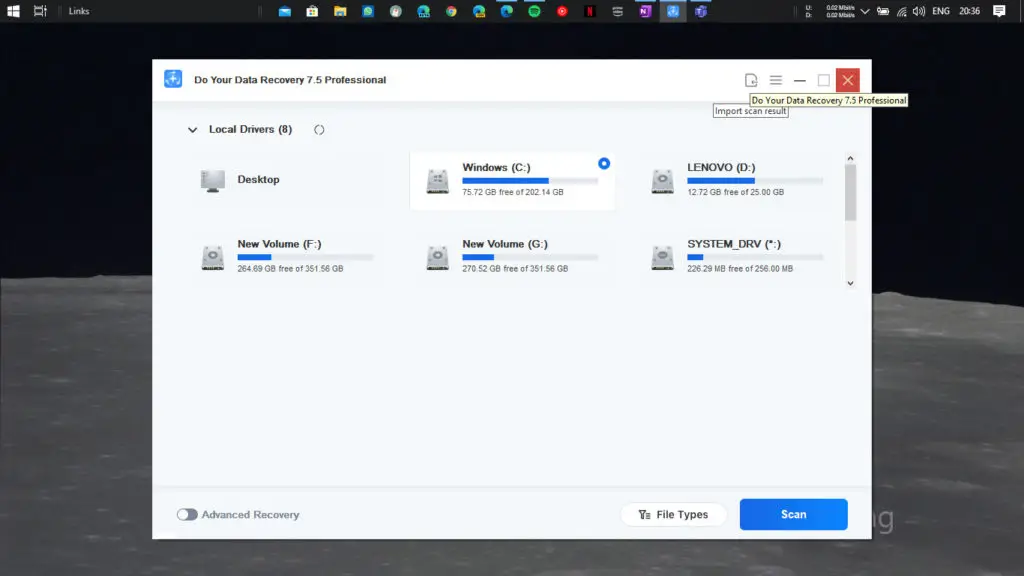
Once you have successfully recovered your files, you can import that data by heading towards the import option on the top right corner.
Pricing
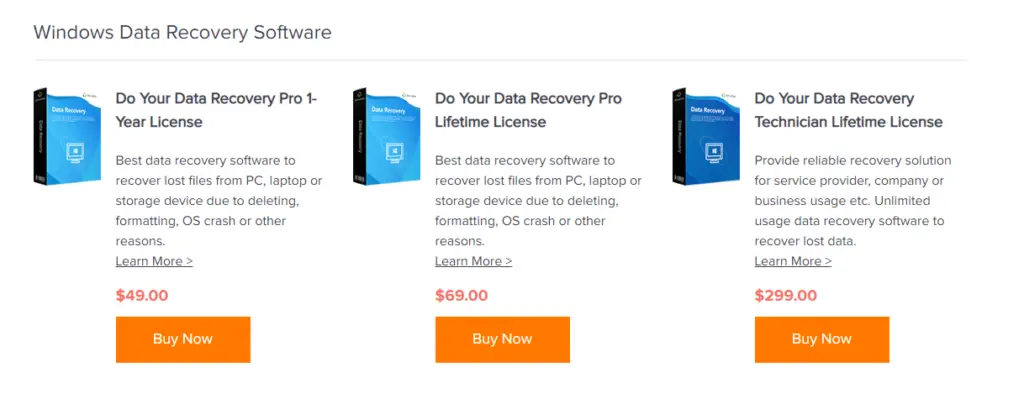
Do Your Data Recovery for Windows comes in three tiers.
- 1 Year License for $49
- Lifetime License for $69
- Technician Lifetime License for $299 (can be used on different devices with no limitation on usage)
You can first download the free trial version and check if files on your computer are recoverable or not. After that, you can proceed to go with any of the above options depending upon your usability.
Our Verdict
The software was able to recover deleted files from our partitioned drive. The software creates a separate directory, as shown during the preview process, and puts your recovered files. You can also change the location if you wish to create a separate folder and then put your recovered files there.
The scanning process’ time depends upon which model you select. A quick scan will hardly take 5 minutes whereas if your select advanced recovery scan, it will take you hours until the scan gets completed. It is acceptable since the software intensely scans your entire drive and even checks for damaged or other file types which quick scan could not find. The user interface of the application is relatively simple, and the instructions are clear. Overall, Do Your Data performs quite well and as intended to.
