If you have been a long-time Samsung Android user, you might know that Samsung developed software named Odin. Service centers use Odin internally to flash and update firmware and other communications with Samsung’s devices.
You might ask how this is different. It is different because generic Android devices, including Google, Motorola, and OnePlus, use the ADB and Fastboot for the same purpose. They are cross-compatible with Android devices of different brands. However, ADB and Fastboot cannot be used with Samsung’s Android devices.
Odin was never officially released to the public, but the internet had its way, and here we are. Odin is now generally used by developers and the general public to flash custom kernels, custom recovery, stock ROMs, and other tweaks, which were never possible without Odin.
It is important to note that Odin is officially only compatible with Windows. If you are using macOS or Linux, there is an alternative named Heimdall. (What a creative way to name a tool—you get the reference, right?)
If you want to flash ROM on your Samsung device, one of the easiest ways is to flash TWRP recovery. In this article, we will tell you how.
Disclaimer: Following these instructions could potentially render your device inoperable. Please proceed with caution and follow the instructions carefully. You are solely responsible for any damage caused to your device. Additionally, following these instructions will void your warranty. If you are unsure, carefully review the warranty statement.
Prerequisites
- Windows PC
- Charge your device to at least 60%. (The more the merrier)
- Install Samsung Kies from here and Samsung USB Drivers from here.
- Unlocked Bootloader
Steps to Flash TWRP Recovery using Odin on Samsung Device
- The first thing you need to accomplish is finding a TWRP Recovery Image compatible with your device model. If there are any official builds, you can find them here; otherwise, for unofficial builds, you can check out forums like XDA. (Please ensure that you download the .tar file instead of .img file)
- Once you have the TWRP recovery image, download Odin from here.
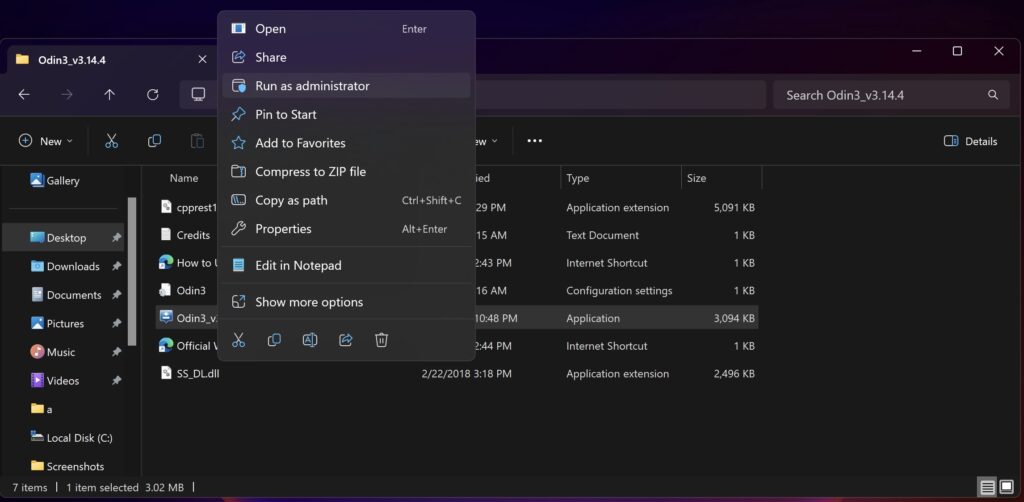
- Extract the Odin zip file, right-click on the Odin executable file, and click Run as administrator.

- Boot your device in Download Mode:
- Power off your device
- Press and Hold Volume Down + Power
- When the warning screen shows up, press Volume Up to accept. You are now in download mode.
- Connect your device to your Windows computer.

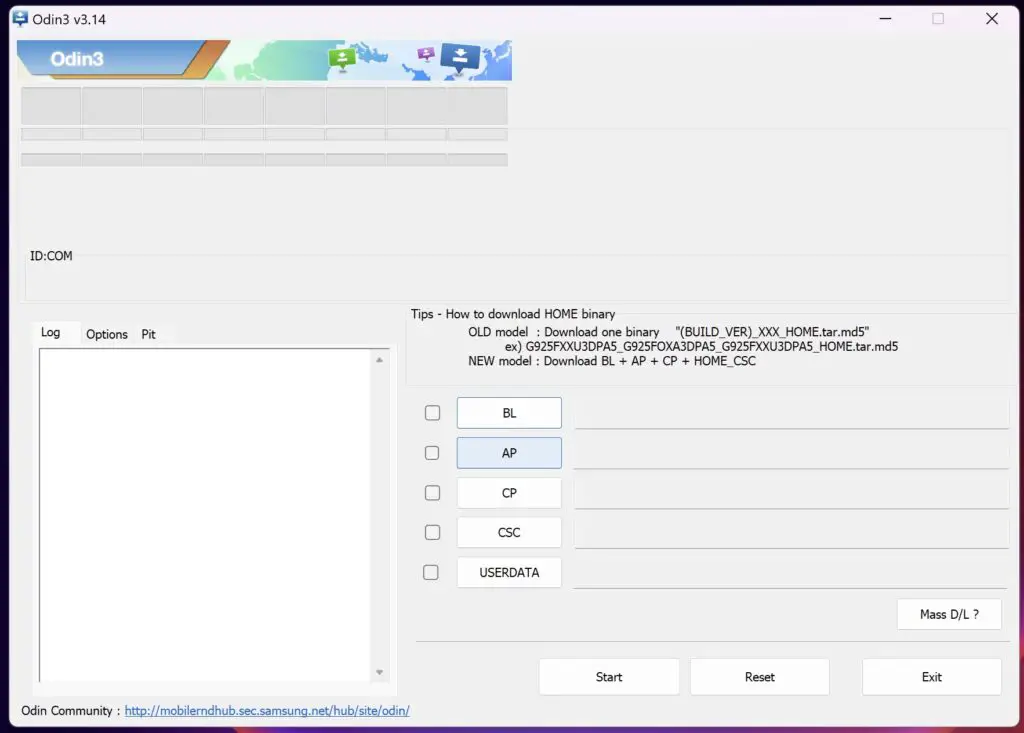
- In the ID:COM section, you will see a COM port number with a light blue background. This means your device is successfully connected.
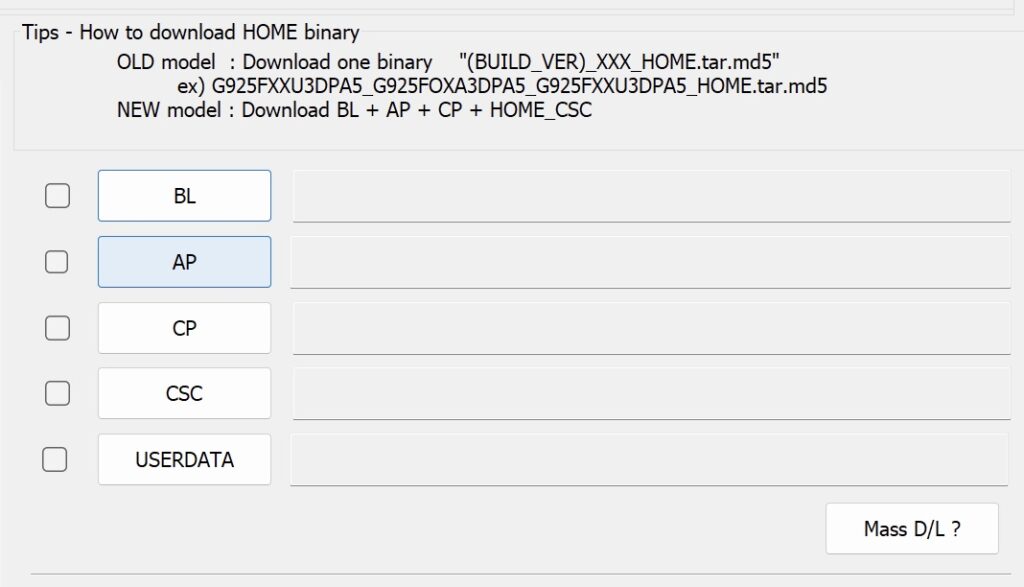
- Click on the AP Button. Select the downloaded TWRP recovery image file.

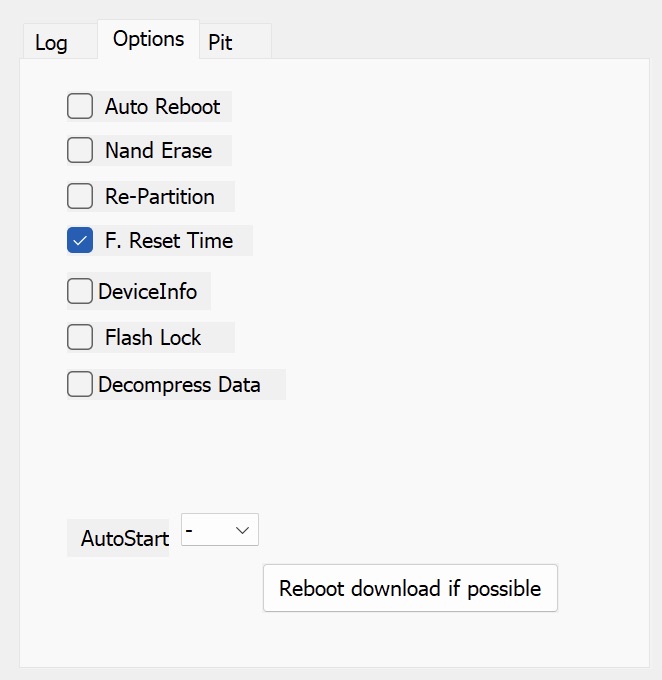
- Head over to the left section and open the options tab.
- Uncheck Auto Reboot and Re-Partition.

- Click the Start button to start the flashing process and wait for it to complete. You will see a Pass message.
- Generally, the Stock Recovery is automatically replaced by the ROM on the first boot on newer devices. So, to prevent this, we need to perform a few steps.
- Press and Hold Volume Down + Power for about 7 seconds to reboot the device. Immediately as the Download Mode exits, press Volume Up + Power to reboot to recovery.
- Your device will boot into TWRP recovery, which automatically patches the ROM so as not to replace it with the Stock Recovery.
In case something goes not intended, you can repeat the process again.
So that was all about flashing a custom recovery, in this case, TWRP, on your Samsung Android device. Now, you can explore additional customizations that come with installing a custom recovery. You can find more about amazing customizations on product forums on XDA developers.
Frequently Asked Questions (FAQs)
After flashing recovery using Odin, the device is stuck in a boot loop?
Mostly, you have flashed something that is not compatible with your device. The best thing to do in such a case is to download the stock ROM and flash it using Odin.
Odin is not detecting my Samsung Phone?
Ensure you have installed proper drivers, as mentioned in the article above.

there is no custom recovery or root info about SM-A920F
Thanks, Kris!
Wow! Great article! Very informative and helpful.
Hello Peter,
You can use the AP instead of PDA. Source: https://forum.xda-developers.com/showthread.php?t=2729699
There is no “PDA” in your screenshots… Is it “BL” “AP” “CP” or “CSC” or what??