One of the biggest perks of being an Android user is being able to do almost anything with your device. Whether you want to load a custom ROM, flash a custom recovery, sideload apps, etc. The same is not possible with Apple iOS devices, at least as of now.
However, as per the reports, Apple may soon allow users to sideload apps in the EU region. But honestly, we don’t have much hope of customizations because we are talking about Apple here.
Till then, the only alternatives for tech junkies like us are to rely on Android and its well-established online community for customizations.
What is ADB?
ADB, or “Android Debug Bridge,” is an interface between your computer and Android smartphone. This tool allows you to send a wide array of terminal commands.
Google developed ADB for developers to test and debug their apps. Certain things on your Android device can only be done with the help of ADB. We will discuss them in this article later on.
You can send commands when the phone is turned on, booted, or even in recovery mode. ADB is often associated with rooting or modifying your phone, but you can also use it to send terminal commands to non-rooted devices.
How does ADB work?
ADB works on what we call client-server architecture. If you are a techie, you already know what it means, but for those who aren’t, let us simplify this for you. Three entities come into play here:
- A Client: In this case, the client will be the command that will run on the computer on your Android device. This will be when you invoke the adb command.
- A Daemon (adbd): It is a background process that runs command on a device. If it is not already running, you will get a message saying “adb daemon is started” when you invoke the adb command from your computer.
- A Server: It is a background process that manages the communication between the daemon and the client.
If you are starting adb for the first time since the reboot, it will start the adb daemon server process. The service will bind itself to the local TCP port 5037 and start listening for the commands from the client.
Once the adbd (adb daemon) is successfully started, it will scan for odd-numbered ports from 5555 to 5585 for adb devices connected to your devices. It only scans odd-numbered ports because even-numbered ports are used for console connection, and the following number, which is an odd number, is used for adb connection.
Enabling ADB Debugging on Your Android Device
On Android 4.2 & later, the Developer Options Menu is hidden by default. Follow the steps below to enable the Developer Options menu and then Enable ADB Debugging:
- Find the appropriate steps for your Android device from the list below:
- Google Pixel & Other Stock Android-Based Devices: Settings > About phone > Build number
- Samsung Galaxy S8 and later: Settings > About phone > Software information > Build number
- LG G6 and later: Settings > About phone > Software info > Build number
- You’ll see a pop-up that says, “You are now a developer”.
- Head back to Settings > Advanced.
- A new option called “Developer Options” will appear.
- Tap it and Enable USB Debugging.
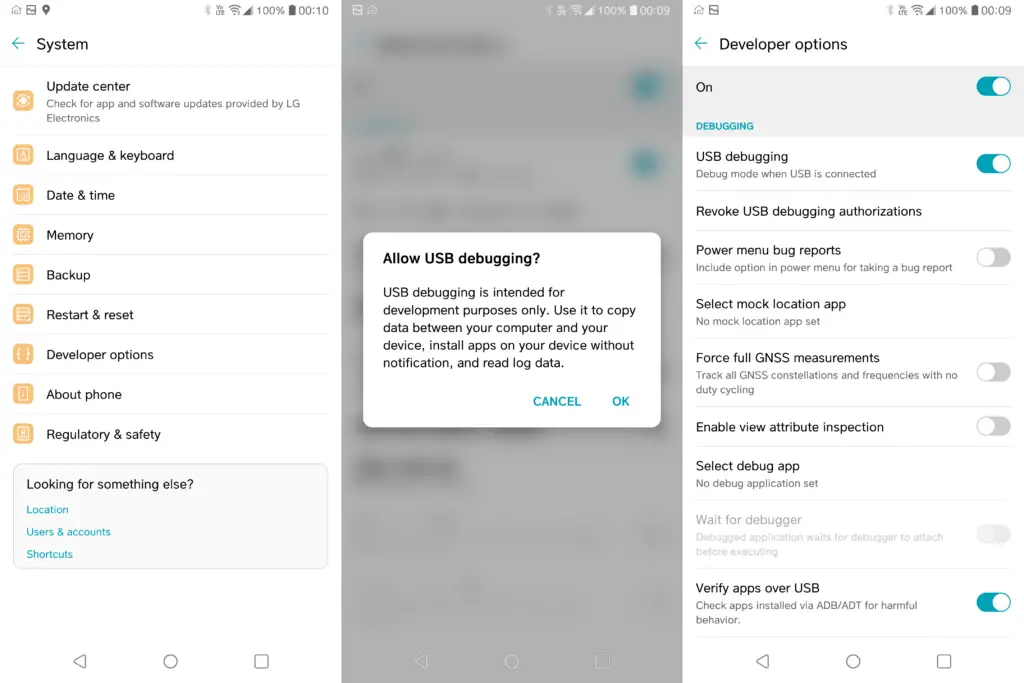
Installing Drivers for Your Android Device
It is not generally required in modern computers, but if the device manufacturer is providing drivers for your Android device, you should install it anyway. Here is an article to help you Install Android Device drivers for all popular OEMs.
How to Setup ADB & Fastboot on Your Computer
We will divide this into three sections: Windows, macOS & Linux. So kindly select the one that applies to you.
How to Setup ADB & Fastboot on Microsoft Windows
- Download Android SDK Platform Tools for Windows.
- Extract the downloaded file at the preferred location. (In our case: C:\platform-tools)
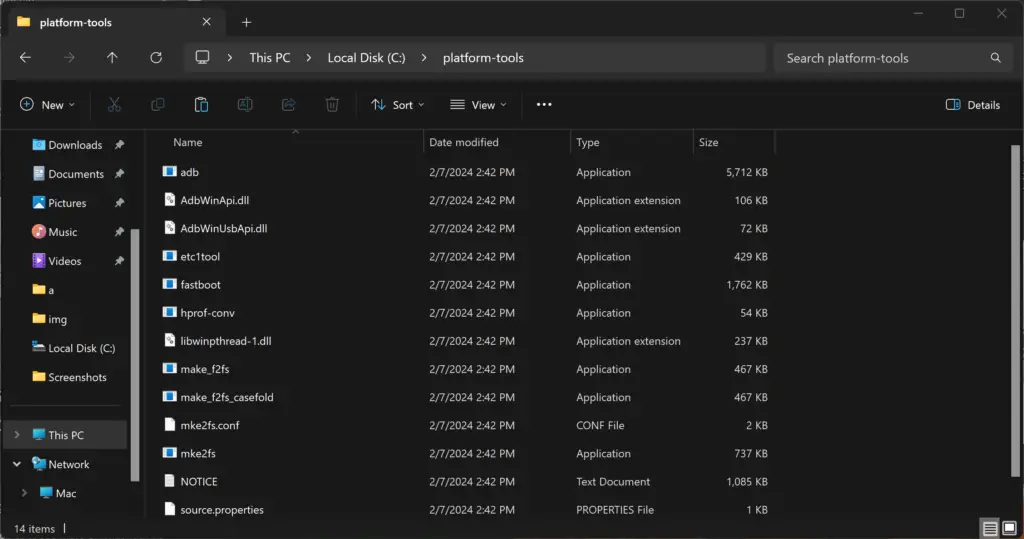
- Open the folder where you just extracted the files. Hold the shift button and right-click anywhere in the empty space.
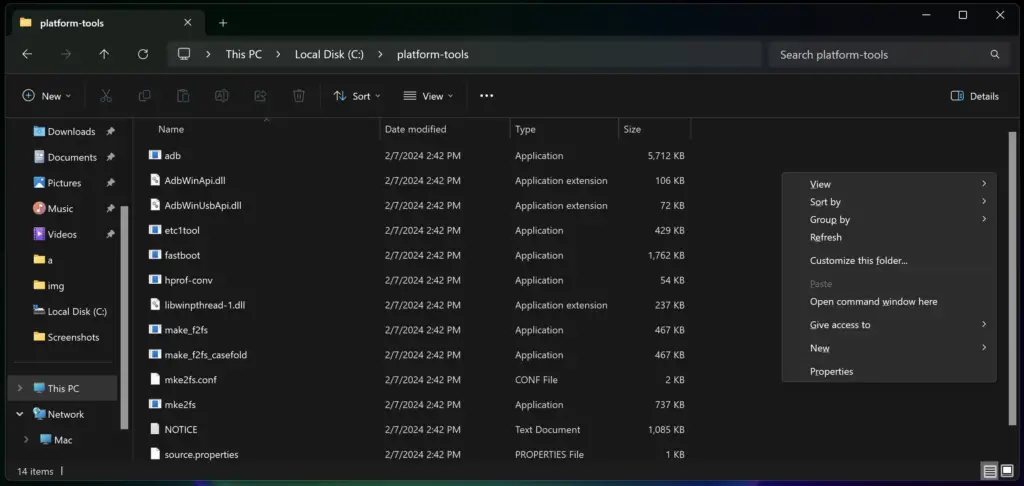
- Click Open command window here or Open PowerShell window here or Open in Terminal
- Connect your Android device via USB. If you can select USB mode on your Android device, select “File Transfer (MTP)” mode.
- In the terminal, type:
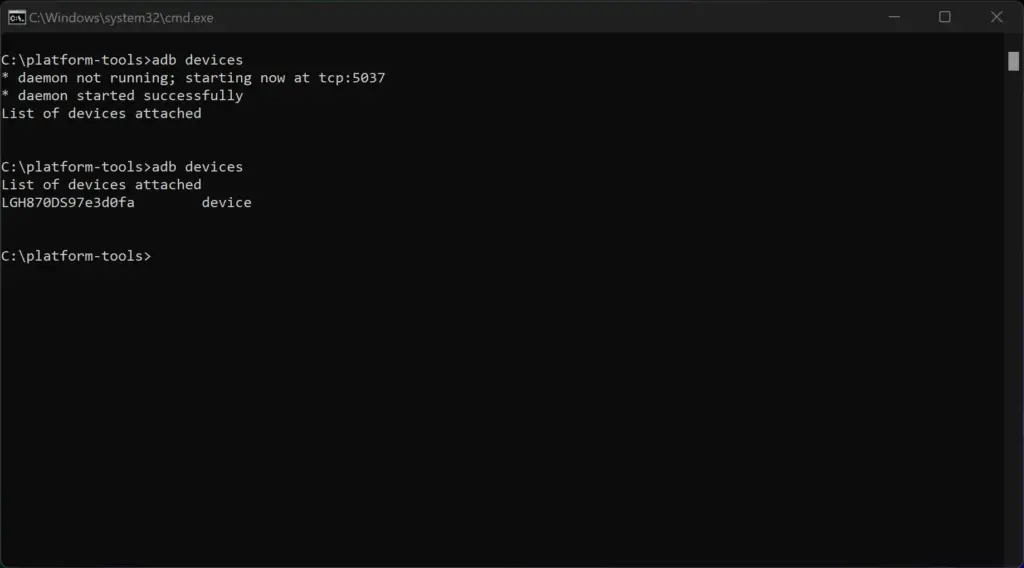
adb devices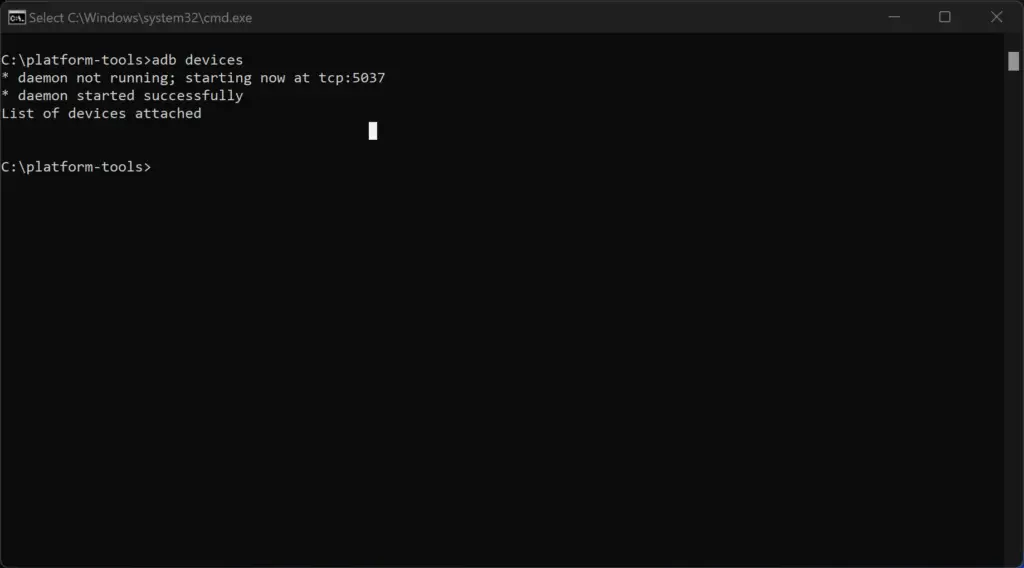
- Your phone will prompt you to allow or deny ADB access. Tick “Always allow from this computer,” and tap Allow.
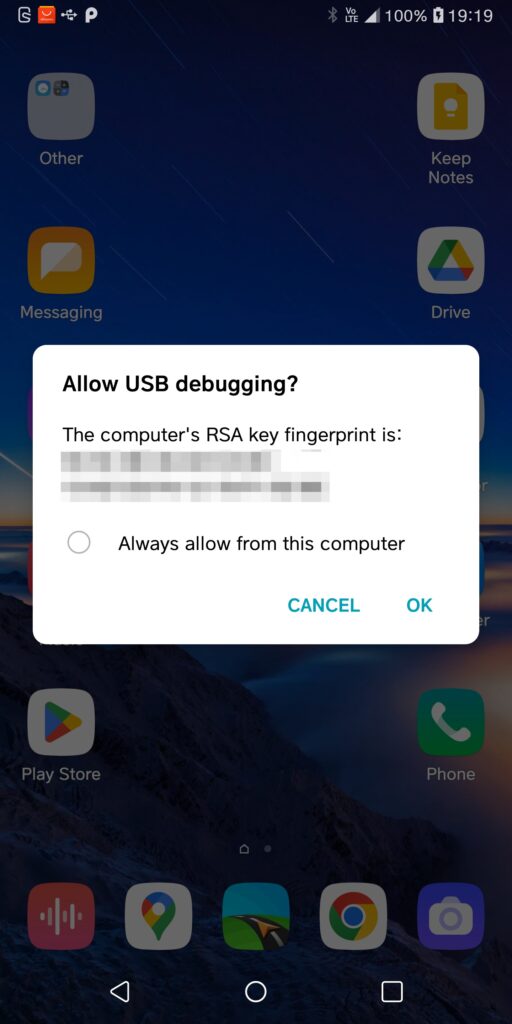
- If everything goes as expected, you will see your device in the attached device list. If not, rerun the previous command.
How to Setup ADB & Fastboot on Apple macOS
- Download Android SDK Platform Tools for macOS.
- Extract the download zip at a preferred location.
- Open Terminal.
- Mount the folder where you extracted the files using cd command. In our case, this:
cd /Users/mehul/Downloads/platform-tools/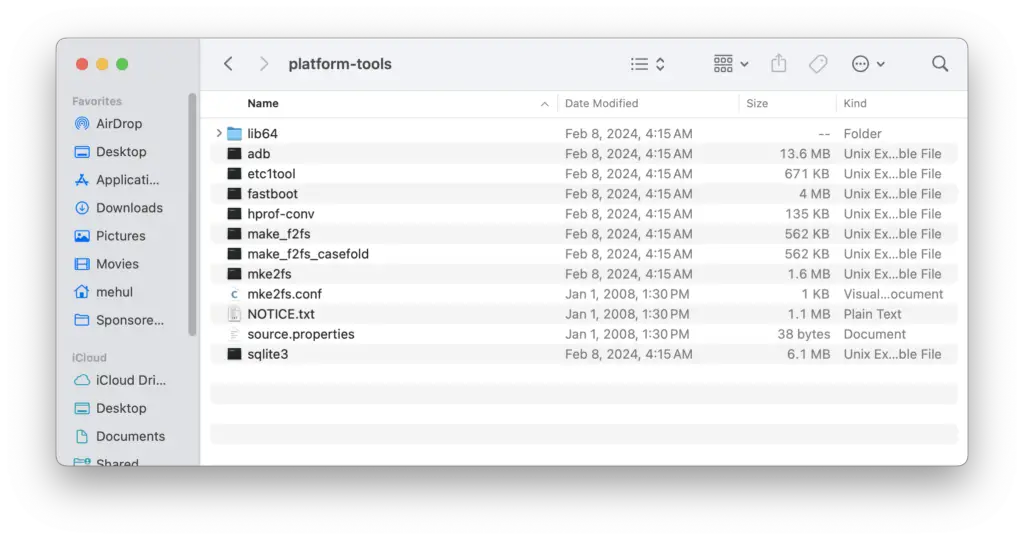
- Connect your Android device via USB. If you can select USB mode on your Android device, select “File Transfer (MTP)” mode.
- Type the following command
./adb devices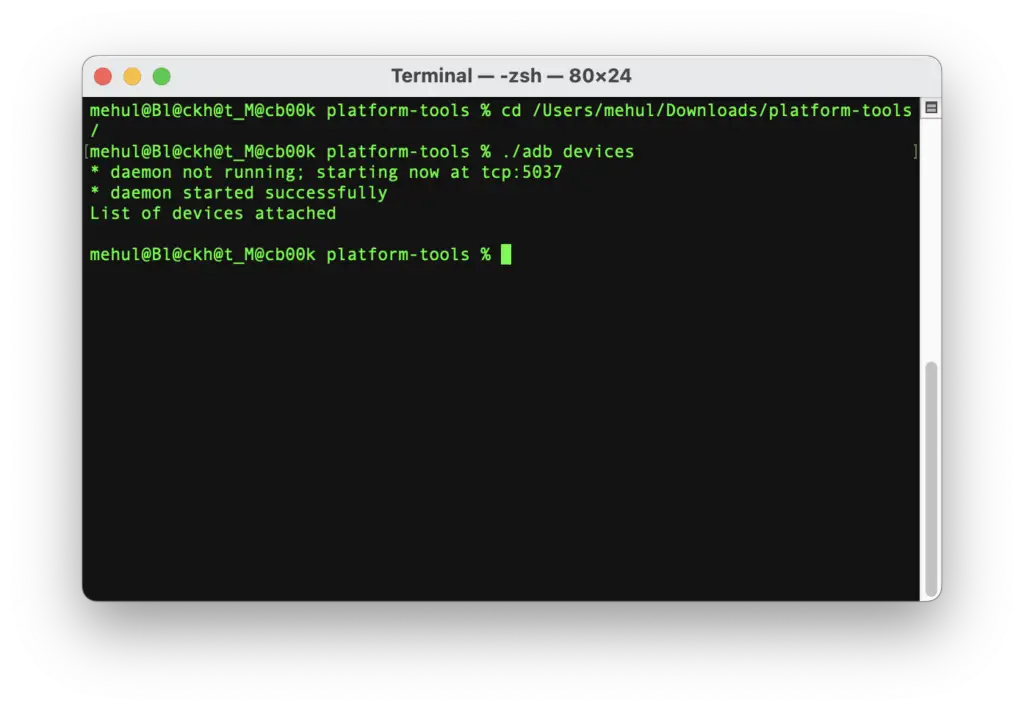
- Your phone will prompt you to allow or deny ADB access. Tick “Always allow from this computer,” and tap Allow.

- If everything goes as expected, you will see your device in the attached device list. If not, rerun the previous command.
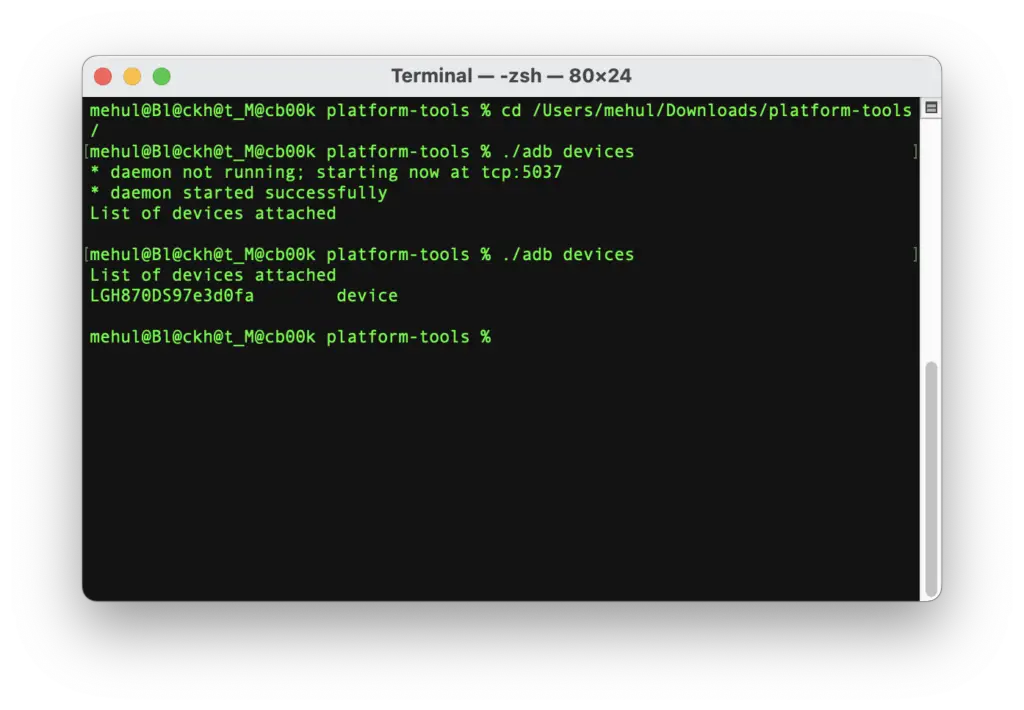
If you are someone who has been using macOS for a long time and prefer Homebrew to install packages on your Mac. You can use the following command to install adb:
brew install --cask android-platform-toolsHow to Setup ADB & Fastboot on Linux
- Download Android SDK Platform Tools for Linux.
- Follow the same process as we did with macOS in the previous section.
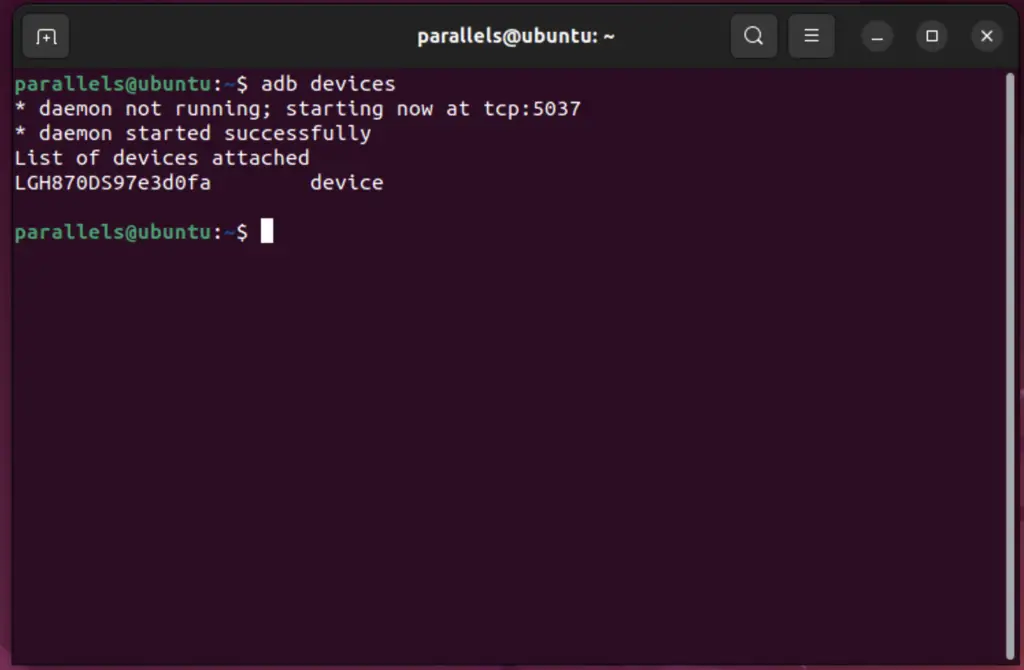
If you want to use the package manager to install Android SDK Tools, you can use the following commands.
For Debian based Linux like Ubuntu
sudo apt install android-sdk-platform-toolsFor Fedora or SUSE based Linux
sudo dnf install android-toolsWhat is Fastboot?
Like ADB, Fastboot is a communication protocol used on Android devices. It is generally used to modify and flash partitions on Android devices. It allows you to send commands to the bootloader, allowing you to flash/change things like custom recoveries. It’s helpful for many things that ADB can’t do.
Fastboot isn’t enabled for all phones, so you may have to check your particular device. To use fastboot, your Android device must boot into fastboot or bootloader mode.
How to use Fastboot Mode
- Connect your device with adb mode enabled to your computer.
- Type the following command to reboot your device in fastboot bootloader mode:
adb reboot bootloaderAlternatively, you can power off your device and use a combination of volume and power buttons per the device’s specifications.
Follow the same process of that of adb we did earlier. Just replace adb with fastboot.
Commonly Used ADB Commands
- Start ADB Server: adb start-server
- Kill ADB Server: adb kill-server
- Reboot Device: adb reboot
- Reboot to Recovery: adb reboot recovery
- Reboot to Bootloader: adb reboot bootloader
- Open terminal on host device: adb shell
- Show connected ADB devices: adb devices
- Connect to ADB wirelessly over IP address: adb connect ip_address
- Android device logs using logcat: adb logcat
- Copy files from computer to Android device: adb push [source] [destination]
- Copy files from Android device to computer: adb pull [source] [destination]
- Install APK from the computer on Android device: adb -e install apk_source.apk
- Uninstall app on Android device: adb uninstall app_package_name
Commonly Used Fastboot Commands
- Show connected fastboot devices: fastboot devices
- Reboot device: fastboot reboot
- Unlock Bootloader: fastboot oem unlock
- Relock Bootloader: fastboot oem lock
- Reboot into Recovery: fastboot reboot recovery
- Reboot into Bootloader: fastboot reboot bootloader
- Flash boot partition: fastboot flash boot boot_img_location.img
- Flash recovery partition: fastboot flash recovery recovery_img_location.img
So that was all; we covered almost everything that you would need to know as a beginner about adb and fastboot on Android devices. If you want to dive deeper, read the official Google documentation to gain more insights.
