Flashing a kernel image on an Android device with Fastboot can be useful for several reasons. One of the most common is to root the device, which allows users to access the system files and customize the device beyond the manufacturer’s limits. This can help users eliminate unwanted apps, improve performance, and even install custom ROMs.
Another reason to flash a kernel image is to fix a boot loop issue that may occur due to a corrupted kernel. In such cases, flashing a new kernel image can help resolve the issue and get the device up and running again.
In general, flashing a kernel image with Fastboot can be a powerful tool for advanced Android users who want to fully control their devices and customize them to their liking. However, the process can be risky and may void the device’s warranty, so it should only be attempted by experienced users who are willing to take the risk.
Before proceeding further, we recommend backing up your Android device so that you can always get your data back.
Requirements
- Kernel Boot Image. (From a Verified or Trustable source )
- Android device drivers.
- If a bootloader is available, make sure it is unlocked. Read: Unlock HTC Bootloader, Unlock Sony Bootloader.
- USB Cable.
- Windows PC or a Mac.
Steps to Flash Kernel image using ADB and Fastboot
- Before proceeding with any modifications on your Android device, you must ensure you have unlocked the bootloader. If you haven’t done it yet, you can search online for instructions on unlocking your device’s bootloader. It is worth noting that unlocking the bootloader of your Android device may void your manufacturer’s warranty, so proceed at your own risk. Typically, the manufacturer’s website provides instructions on how to unlock the bootloader.
- Install ADB and Fastboot on your computer using this tutorial.
- To enable USB debugging on your device, follow these steps.
- Connect your device to your computer via a USB cable.
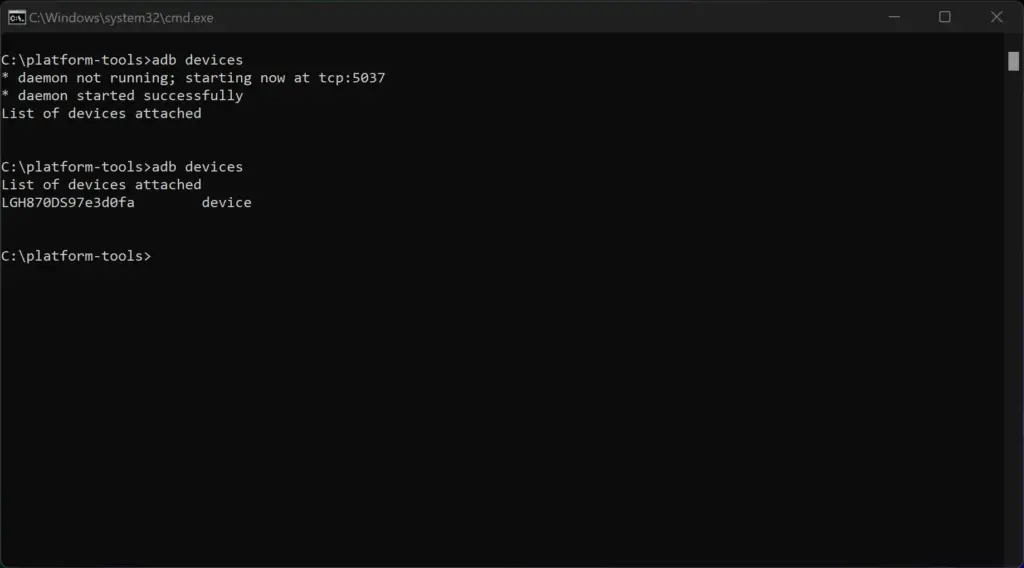
- To check whether your device is detected or not, follow the process given here and type:
adb devices
- Reboot into bootloader mode using the following command:
adb reboot bootloader- Copy the kernel boot image to the desired location and rename the kernel boot image to boot.img.
- Type the following command to flash the kernel image:
fastboot flash boot [path-to-boot.img]/boot.img- Now, type the following command to reboot your device:
fastboot reboot- Now disconnect your device and check out the new kernel.
Also read: How to Flash TWRP Recovery via Fastboot on Android
Flashing a kernel image on an Android device with Fastboot can be a powerful tool for advanced users. Remember to backup your device before proceeding with any modifications, and always make sure to use verified or trustable sources for the kernel boot image. By following the steps outlined in this article, you can successfully flash a new kernel image on your Android device and take full control of its customization. Let us know in the comment section if you need any help.


We are glad we were able to help you out, cheers!
fixed solved thanks bro who put this
Hello Pedro,
We have fixed the mistake. Thanks for notifying!