Raspberry Pi has gotten very powerful over the years, especially with the launch of Raspberry Pi 5. Putting things in perspective, currently, we are using our Raspberry Pi 4 (4 GB version) to run a VPN Server, 2 Instances of Transmission, a Files Server, a LAMP Server, a Pi-Hole, a Home Assistant, and many other services.
So, it becomes quite essential to monitor the temperature of your Raspberry Pi, especially if it runs 24×7. As per the official figures, it must stay under 85°C at all times to prevent any permanent damage. Raspberry Pi will start throttling the CPU/GPU performance once it reaches 80°C.
There are various methods via which you can get the current temperature of the Raspberry Pi; most of them are mentioned below.
Ways to Monitor the Raspberry Pi’s Temperature
1. Using Broadcom’s vcgencmd
One of the easiest methods to access the temperature data is by using the built-in command line tool vcgencmd. Type the command below:
vcgencmd measure_tempThis command will show you the Pi’s temperature in Celsius:

However, this is a one-time output method. If you want to monitor the temperature continuously, try the method #3.
2. Reading Data with Thermal Zone Driver
Use the following command to read the raw temperature data.
cat /sys/class/thermal/thermal_zone0/tempYou will get the following output:

The number 48686 will need to be divided by 1000, which will be 48.68°C. Just like Method #1, this is also a one-time output method. For continuous monitoring, follow Method #3.
3. Using Watch Command with Method #1 or #2
We can use the watch command to execute any command at a specified interval.
watch -n [seconds] [command]Here, replace [seconds] with number of seconds to wait before repeating the command and [command] with any one-time output command.
Use the following command to refresh the output of Method #1 every one seconds:
watch -n 1 vcgencmd measure_temp
The same can be repeated with Method #2 using the command below:
watch -n 1 cat /sys/class/thermal/thermal_zone0/temp
To exit the watch command, Press Control + C.
4. Using Python & Built-In Libraries
If you prefer using Python scripts over Bash, we have prepared a small Python code that will update the temperature on your terminal every second.
You can change the time interval by modifying the number in the sleep() function.
- Create a new file named “temperature_monitor.py” using the following command.
nano temperature_monitor.py- Paste the following code:
import gpiozero as gz
from time import sleep
import os

while True:
    print(round(gz.CPUTemperature().temperature, 1))
    sleep(1)
os.system('clear')- Press Control + X, Type ‘Y’, and press Enter to save and exit the editor.
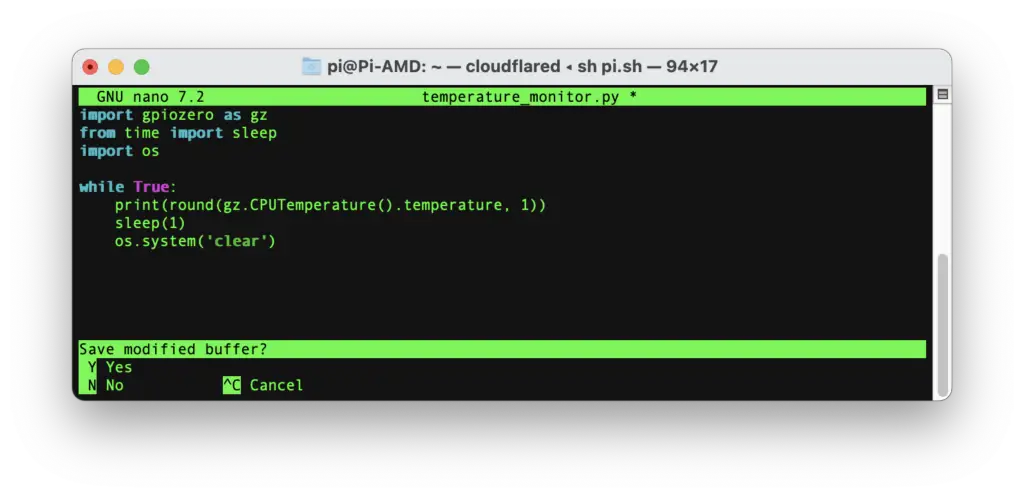
- Type the following command to run the script and Control + X to exit.
python temperature_monitor.py
5. Monitoring temperature with Raspberry Pi Desktop UI
If you are not running Raspberry Pi in headless mode and using it as a normal computer with a display, this method might come in handy. You can simply add the temperature monitor as a panel item in the Taskbar.
- Right-click the Task Bar and select Add / Remove Panel Items to open Panel Preferences.

- Go to the Panel Applets Tab and Click Add.
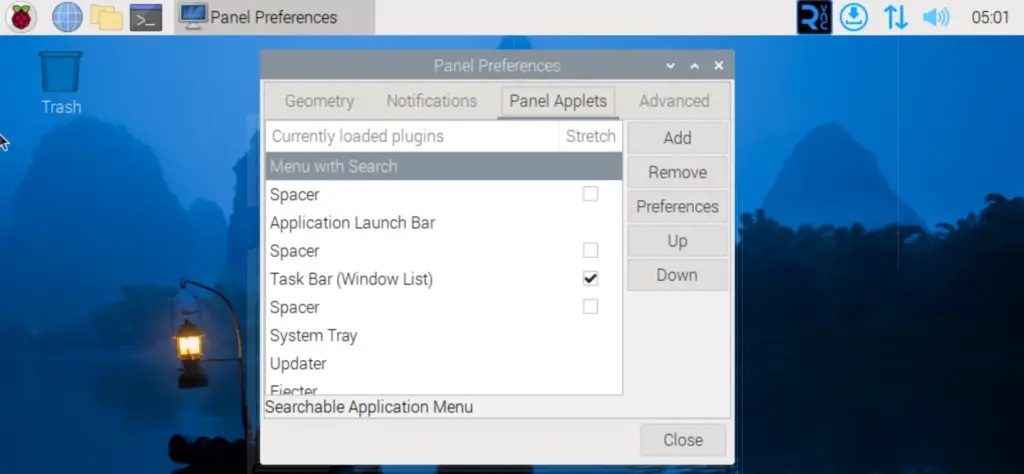
- Select CPU Temperature Monitor and Click Add.
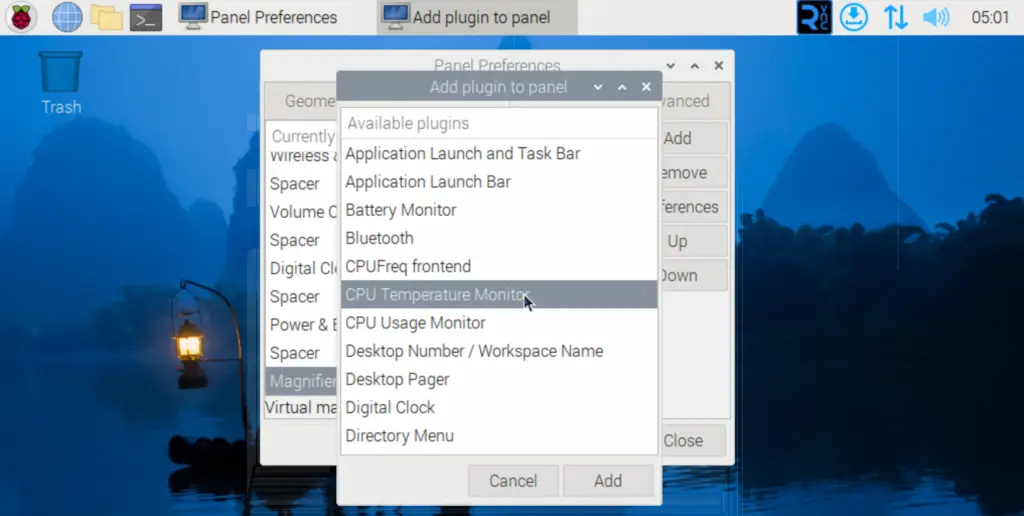
- Close the Panel Preferences; now you will see the CPU Temperature and a Mini Graph on the Taskbar.

Bonus Tip: Creating Alias for Terminal Command to Read Temperature
Suppose you frequently use some commands, for example, to check the temperature, as mentioned in earlier methods. In that case, creating an alias is the easiest way to execute them without remembering the entire command. Here is how to do so:
- Create bash aliases file using the command below:
nano ~/.bash_aliases- Type the following in the file:
alias pitemp='[command]'Replace [command] with any command mentioned in the earlier methods. Here, we are using ‘vcgencmd measure_temp’
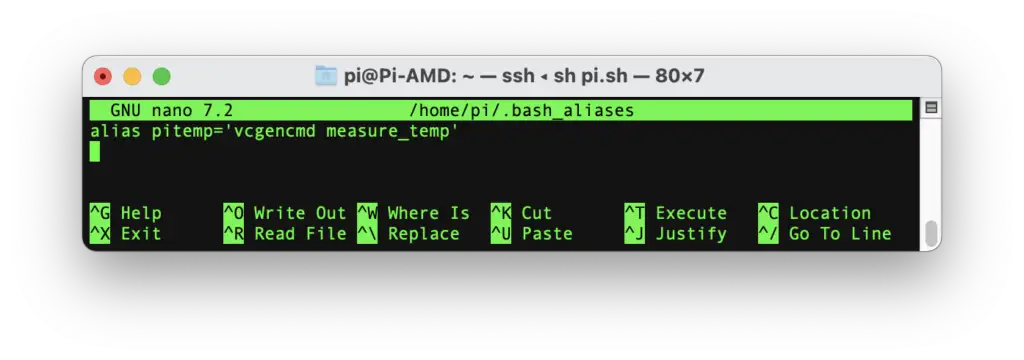
- Press Control + X, then Type Y and Enter to save the changes to the file.
- Close the current terminal session for the changes to take effect. Open a new terminal session and type:
pitemp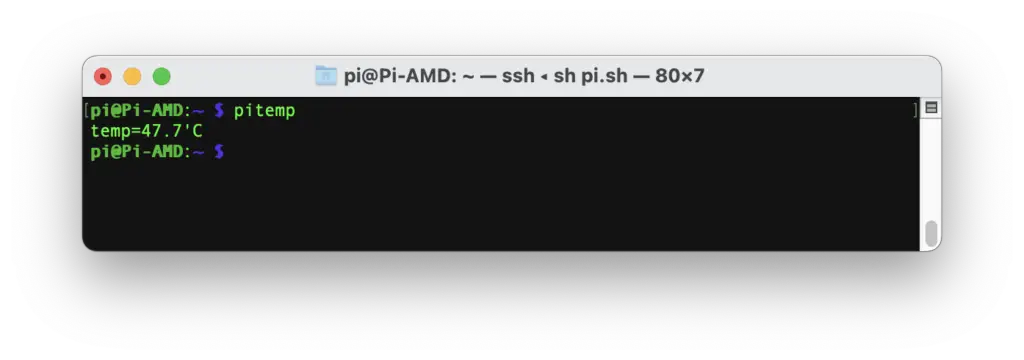
You can do the same with any commands you intend to use frequently.
Also read: How to Automatically Spin Down or Sleep HDD on Raspberry Pi
So, those are almost all the ways you can check and monitor the temperature of your Raspberry Pi. If you think we missed anything, enlighten us in the comment section below.
