We save everything on our smartphones these days. Whether it be our reminders, photos, contacts, calendar, and whatnot. They have become a part of our everyday lives and it’s quite unimaginable to live without them.
But here’s a fact – our phones collect a lot of data. Some of which we give it and the other which it collects on itself. It’s easier to know what data we’ve given access to our phones. But the data our phones have collected itself can be a problem. Especially if you’re giving your old device to someone else.
3 Steps to Completely Wipe Android Phone
In this guide, we’ll show you how you can completely wipe your Android phone.
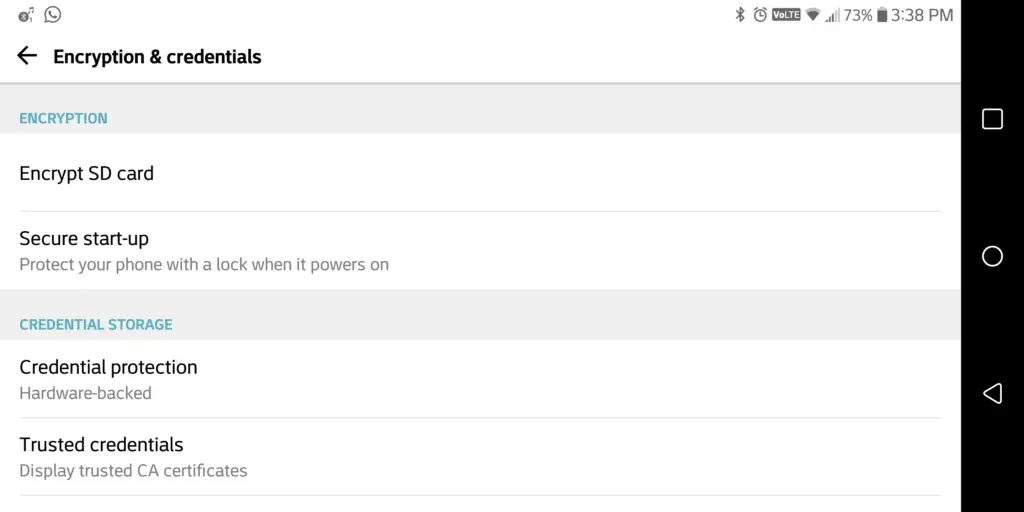
1. Protecting Your Data with Data Encryption & Then Resetting the Android Device
It’s a surprising fact that many people think a Factory Reset will delete all the content of their device. When you Factory Reset your Android phone, it doesn’t really wipe all the data. It just deletes the address of your data so it won’t know where it is stored, instead of overwriting it.
If your phone went to the wrong hands, it might be possible to recover these addresses and get your data back. This is where data encryption comes into the picture. Encryption stores your data in a form that can be read-only when your phone or tablet is unlocked. Unlocking your encrypted device decrypts your data. Encryption can add protection in case your device is stolen. And in this case, if you’re selling your old device.
To encrypt data on your phone, follow these steps. The steps might differ for different phones but the basic process remains the same.
Encrypting on Android 5+

- Open your device’s Settings app.
- Tap Security or Security & Location or Screen lock.
- To choose your screen lock, tap Pattern, PIN, or Password.
- You’ll be prompted to “further protect this device” by requiring your PIN, pattern, or password when your device starts. The first time that you choose this setting, it will encrypt your device.
- Select Require to Start the Device.
- Tap Continue.
- Set your PIN, pattern, or password. Follow the on-screen steps
Encrypting on Android 4.4 or lower
- If you haven’t already, set a lock screen PIN, pattern, or password first.
- Open your device’s Settings app.
- Tap Security & Location option.
- Under the option “Encryption,” tap Encrypt Phone or Encrypt Tablet. (You won’t be able to tap this option if you haven’t charged your battery or your device isn’t plugged in.)
- Carefully read the information shown after this step. It’s important to know that:
- After encrypting, you can turn off encryption only by factory data reset, which will erase all of your data (which is our goal here.)
- If you use an accessibility service like TalkBack or a Bluetooth-paired accessibility device, you’ll always need to enter your PIN, pattern, or password at start-up without the help of your service or device.
- If you change your mind about encrypting your device, you can tap the Back button
- Tap on Encrypt phone or Encrypt tablet options.
- Enter your lock screen PIN, pattern, or password. Click on Continue.
- Tap Encrypt Phone or Encrypt Tablet again for encrypting successfully.
After encrypting, you’ll always need to enter your PIN, pattern, or password when your device starts.
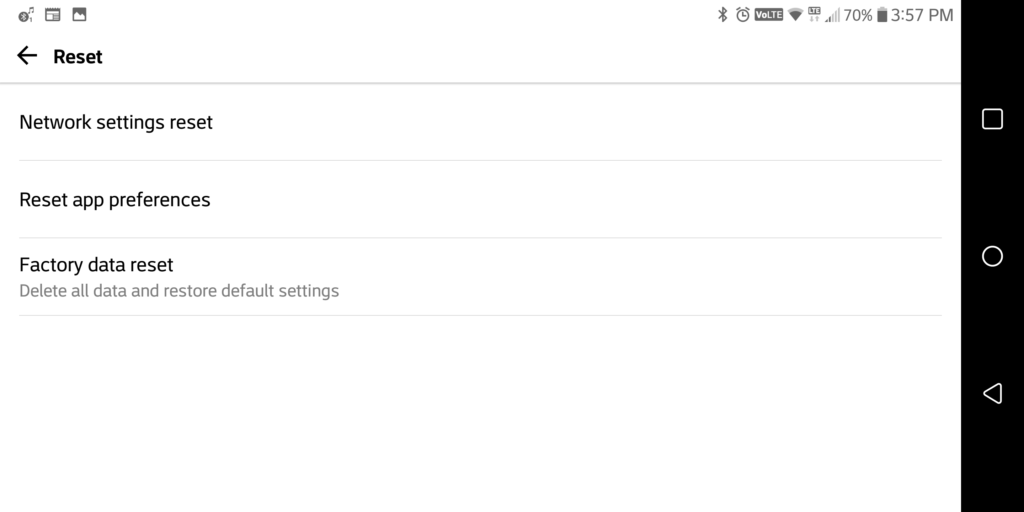
Now that you have successfully encrypted your phone, Factory Reset your device. This will ensure all the data is wiped up clean from your device and you can safely give it away.
To Initiate the Factory Reset Process, Follow These Steps:

- Open your phone’s Settings app.
- Tap System Advanced Reset Options.
- Tap Erase All Data (Factory Reset) > Reset Phone. If needed, enter your PIN, pattern, or password.
- To erase all data from your phone’s internal storage, tap Erase Everything. You can also erase data from your memory card.
- When your phone has finished erasing, pick the option to restart.
Congratulations! All your data is successfully wiped up and any remaining data is still encrypted which can’t be recovered.
2. Overwriting Junk Data

After performing Factory Reset, there are still some junk data, which although encrypted, is still present on your device. To further delete this junk data, you have to overwrite it.
To do this, you can load some really large files such as movies and videos to your phone until your internal storage gets almost full. This will further ensure that there are no remaining encrypted files as well. You can even use data shredder apps like Shreddit, SDelete, and iShredder which will do the job for you.
3. Removing Factory Reset Protection
Factory Reset Protection or FRP is a feature which adds an extra layer of security to prevent thieves from being able to steal your phone, wipe it, and then use it or sell it. But if you yourself wish to sell your phone, you will have to turn this feature off.
After performing a factory reset on your device with FRP enabled, if you try to set it up as a new device, it will prompt you to enter the account details for the last Google account that was registered on the device.
To Remove Factory Reset Protection from your Device, Follow These Steps:
- The first step is to remove any kind of PIN or Password on your device. This will also differ from phone to phone. But the general steps remain the same. Head over to Settings > Security > Screen lock and choose None. On a Samsung device, go to Settings > Lock screen > Screen lock type and choose None. On a Xiaomi device running on MIUI, go to Settings > Lock screen & fingerprint reader > Password & fingerprint > Lock screen (swipe left)
- Now, you’d have to remove your Google account. To do this, head over to Settings > Accounts > Google and tap Remove account. On a Samsung device, go to Settings > Accounts and backup > Accounts and tap on Google, then tap Remove account. On a Xiaomi device, go to Settings > Sync > Google > your Google Account > More > Remove Account. If you have more than one Google account registered with your phone, then make sure you remove all of them.
- If you’re having a Samsung or Xiaomi phone, you’ll have to remove your Samsung and MI accounts respectively as well. On a Samsung device, go to Settings > Biometrics and security > Find My Mobile. Then enter your password, tap on your account at the top, and select More > Remove account. On a Xiaomi device, head over to Settings > MI Account > Sign Out.
Once you have removed all the accounts from your device, you can perform a factory reset along with encryption and load large files to ensure no shred of data is left behind.
But before doing all of this, make sure you’ve moved the data from your old device to a new one. Else, you won’t be able to recover literally anything from your previous device.
Final Words
Just a Factory Reset was never a solution if you wanted to completely wipe off every shred of data from your Android Phone. Now that you know how to do that, we hope you feel safer than ever to sell your device or pass it on to someone else.
If you think these steps don’t reciprocate for your particular device, comment down below with your device name and we’ll make sure you get the right details. Also, do let us know if you have any additional steps or measures for wiping off data. We’ll add that as well!
