Since after the pandemic, our lives have become virtual. We are limited to a confined space to carry out our work, usually in front of a computer. From schools and universities to most of the office meetings, everything is happening online. In such a virtual age, it is essential to use excellent tools to maximize our productivity.
It’s important to showcase what’s happening on our screens. With the help of screen recording, you can let others see things you are doing on your computer. There are endless tutorials about every kind of software there is that you can learn via the Internet. All of this is possible only with the help of video recording software.
They can be used for demonstrations, tutorials, troubleshooting, among other things. You might often need to add other things such as subtitles, markings, arrows, or trim unwanted parts of the video, remove background noise, and add more images and clips. You might even want to record yourself from the webcam while presenting what is on your display. We came across Wondershare’s DemoCreator software tool that lets us do all of these things. Let’s take a look at it.
Features
DemoCreator is a powerful software that not only lets you record your screen but also has a video editor baked right into it. The video editor has got fully fledged functions that will help you improve the quality of your content.
Let us check out all the features DemoCreator has to offer:
- Recording your Computer Screen – Recording onscreen content is the primary feature of DemoCreator. It can be used by teachers, office staff, vloggers, gamers, and others to record their screens and share them with the world.
- Capturing Video from WebCam – The software lets you capture your face via the webcam while simultaneously capturing the screen as well. This is great for people who want to present themselves or explain what’s on display. The feature is super useful for online teaching and office presentations, and even gamers or vloggers.
- System and Mic Sounds – By default, DemoCreator records the system sound. It can also record via the mic. It keeps everything separated for editing later, so don’t worry about the sounds getting mixed up. The audio tracks can be mixed or edited separately.
- Custom Frame Rate – The software allows you to set a custom screen size and frame rate before recording. This way, you can adjust the frame rate according to the purpose of your recording.
- Mark Nodes – You can mark nodes while recording so that afterward, you can make changes to those parts accordingly. It’s a nice feature to have, especially if you are recording something for tutorial or education, and you want to add diagrams or figures in between the lectures.
- Add Cursor Effects – You can add cursor effects to show your audience where to look or which buttons to click. It also makes up for excellent visual navigation so that your videos remain easy to follow.
- Annotation Tools – You can annotate your videos and add text, drawings, graphs, and other elements. You can also add annotations in various styles, including captions, overlays, arrows, bubbles, banners, and blur effects.
- Caption Tools – If you want to add captions to your video, you can use the caption tool. It includes the ability to change the font size, text border, caption opacity, and more.
- Green Screen Effects – If you are recording via the webcam and want to change your background into something else, you can use the green screen effects to replace parts of your video.
- Transition Effects – Transition effects make it easier for you to smoothly transit from one part of the video to another and creating a link in between.
Now that we have an overview of all the features let’s dig in deeper and find out how you can use them to make your video awesome.
Using DemoCreator
DemoCreator has two parts, the first one is just the screen recorder, and the other is the video editor. We will tell you how each of these works and how you can get the most out of them. But before all that, let’s install the software first.
Downloading and Installing
- To download Wondershare DemoCreator, go to the official website and click on the “Free Download” button, and the download will get started.
- Now double click on the .exe file and follow the instructions on the screen to finish the installation process.
Now click on the DemoCreator icon, and you will find two modes – Capture and Video Editor.
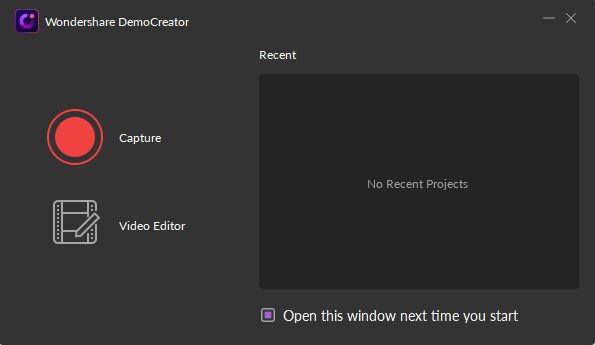
Using Screen Recorder
To start recording, click on the Capture icon. Here are some additional settings that you can change to suit your needs –
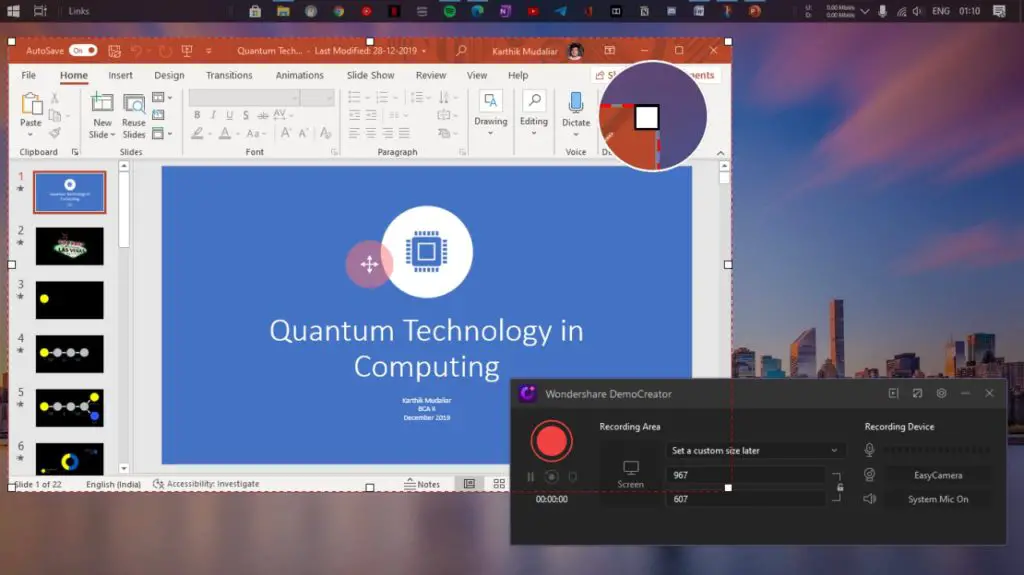
Screen

Here you can choose whether you want to record the full screen, a part of your screen, or a specific target window. You can also choose whether or not you are recording a game. Choose the frame rate you want to record in that ranges from 15 fps to 120 fps.
Audio

You can select if you want to record both system audio and mic audio or record just one of them in this option. If you do not change this setting, both will be recorded by default.
Camera

In addition to what’s on your display, you can also record yourself via the webcam. In this setting, you can change which camera you want to use, the resolution of that camera, and the frame rate of your recording.
Advanced

As the name suggests, here you can choose some additional settings to fine-tune your experience. Select where you want your recording to be saved, types of encoders – AVC or FastJPG, set up Hot Keys, and more.
Recording the Screen
To start recording the screen, click on the capture button. Optionally, you can also press the F10 button on your keyboard to do so. Once you hit recording, the recorder will countdown to 3 seconds and start recording according to the settings. If you want the recorder to only record a particular area on your screen, you can drag the corners before hitting the capture button. There’s also a nifty little magnifier that lets you capture the exact edges of your screen’s display very precisely. If you want to set a custom aspect ratio, you can do so using the Recorder window.
Once you are done with recording, you can press the stop recording button or press F10 again on your keyboard.
Using Video Editor
Now comes the second part of the software, which is the video editor. It has got a host of features, a few of which we are highlighting below.
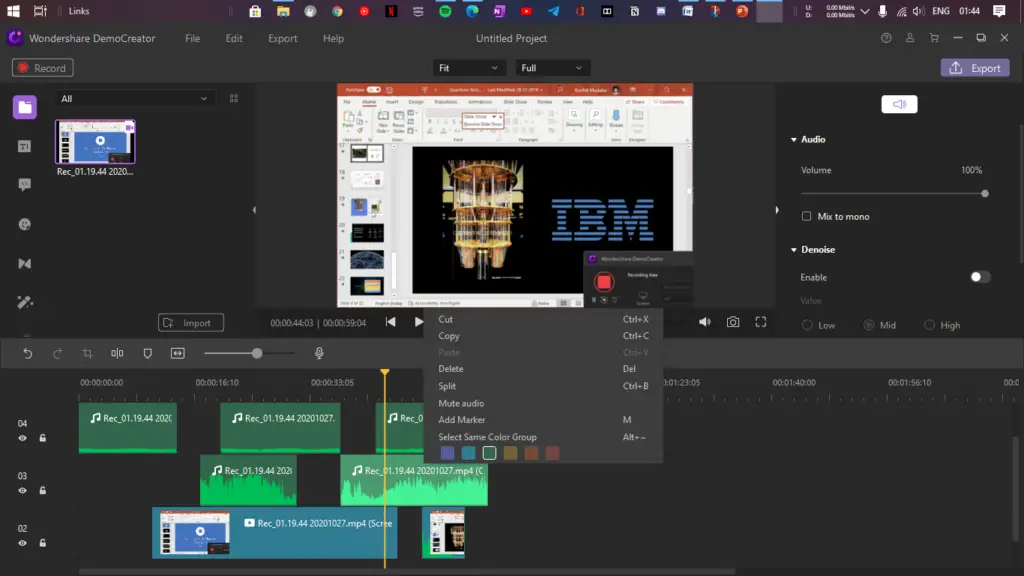
Audio Editing
After recording, your system audio and audio from your microphone are on different timelines. You can easily edit one of them or trim, mute, split, and more. Just select the clip you want to edit and right-click on it. You’ll see some options.
Audio Denoise
You can select any audio clip you have recorded, and then on the top right section, select the Denoise option. This will make the audio clip much cleaner and get rid of all the unnecessary background noises.
Cut, Split, and Trim Video Clips
Perhaps the most critical feature people will use, the software makes it super easy to easily cut, split and trim your video from wherever you want. First, select the video clip, then place the yellow slider on the area from where you want to split the video from. This will split the video into two parts, and you can drag both of these anywhere onto the timeline.
To cut a video, right-click the part where you want to remove and then click on cut. Now the part unwanted will be removed.
To trim a video, hover towards the front or end of the video on the timeline and then drag the video accordingly.
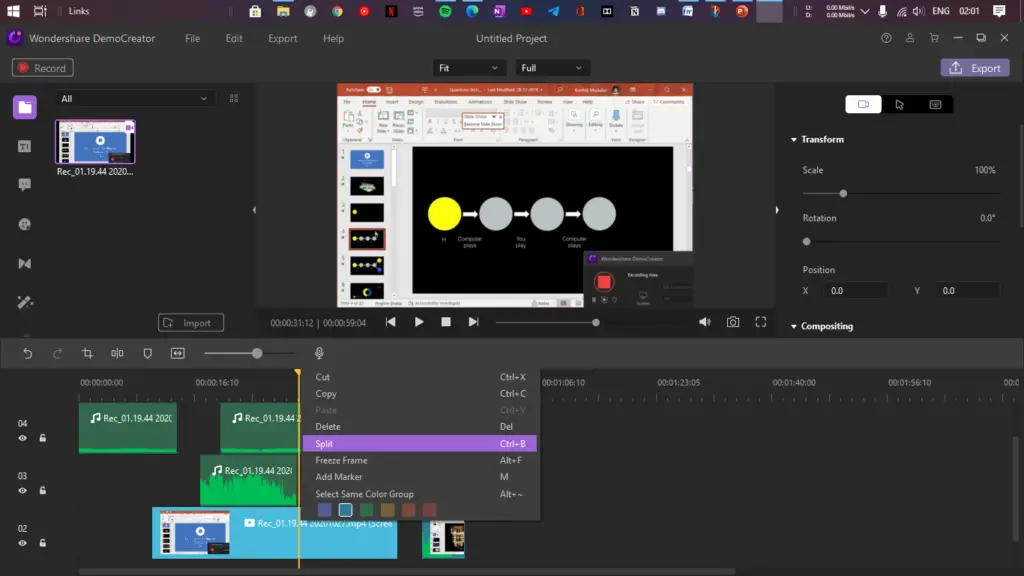
Resize Videos
In case you want to resize the recorded video, you can do so by going to the ‘Transform’ setting on the top right and then using the Scale toggle. Adjust the size of the video in percentage as per your requirements.
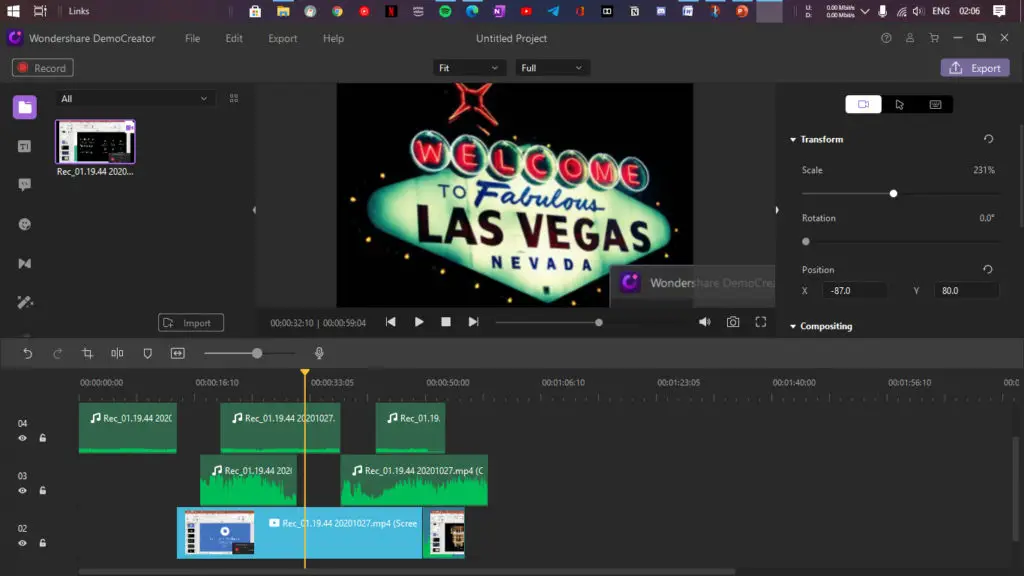
Rotate Video Clips
Changing the orientation of your video is sometimes necessary. To do so, slide the ‘Rotation’ slider under the same Transform option from above, and you can rotate the video up to 360 degrees.
Adding Transition Effects
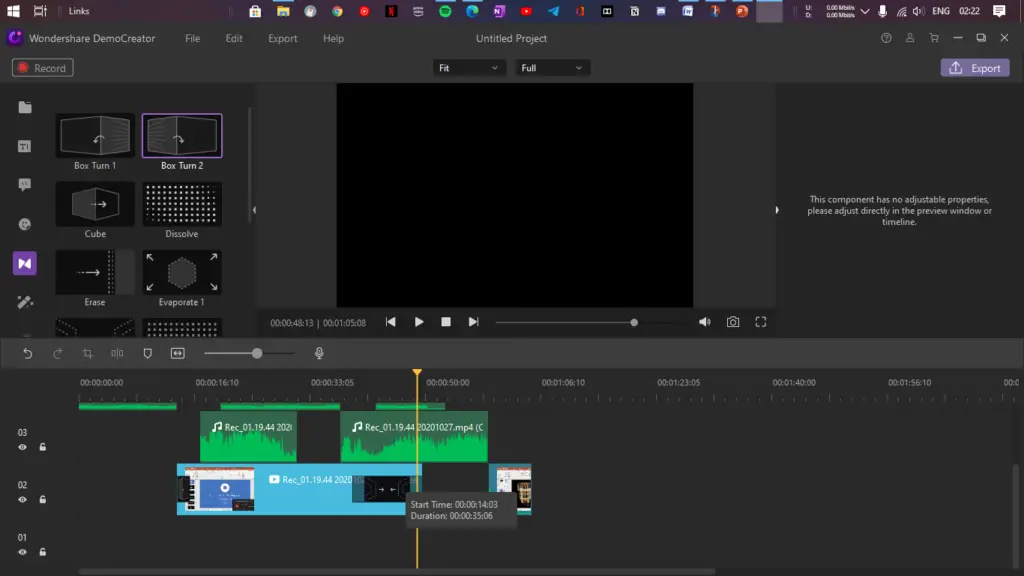
You can use the video editor to add various transition effects and other effects, such as cursor effects, annotations, captions, stickers, and more. You can also set the amount of time each effect will show up on the video.
System Requirements
- Supported OS: Windows 7/Windows 8/Windows 10
- Processor: Intel i3 or better multicore processor, 2GHz or above
- RAM: At least 3GB physical RAM (8GB required for HD and 4K videos)
- Screen Resolution: 1366*768 or better
- Disk: At least 2GB free hard-disk space for installation (SSD-Solid State Disk recommended for editing HD and 4K videos)
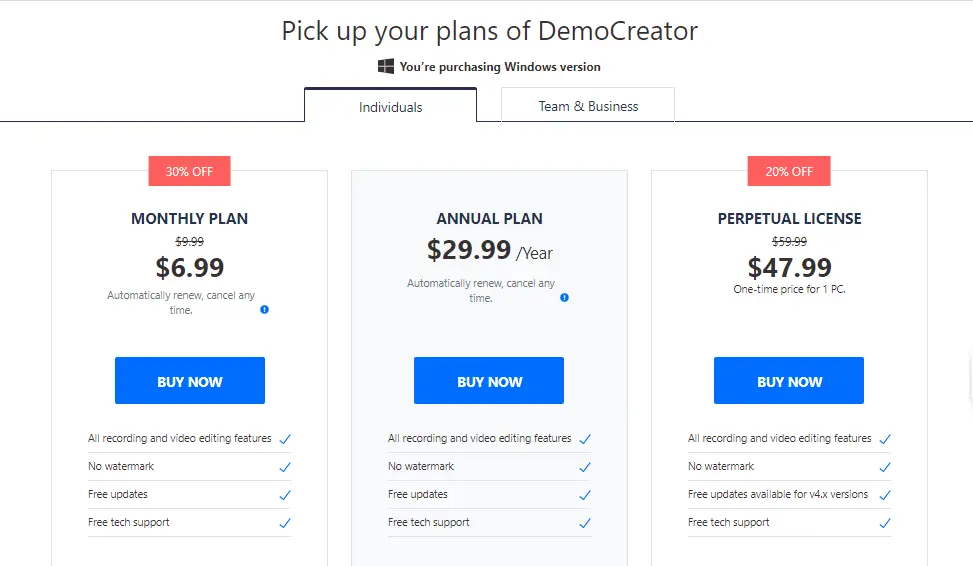
Pricing
Wondershare DemoCreator comes in three pricing plans:
- Monthly Plan: $6.99 per month.
- Annual Plan: $29.99 per year.
- Perpetual License: $47.99, a one-time price for a single PC.
Our Verdict
Wondershare has honestly done a great job developing the DemoCreator. After the pandemic, more and more people are using software like this, and it’s easy to use. While testing this out, we did not have any trouble finding out any features or functions. The interface user friendly as well as intuitive. It is not heavy on the system; both recording and editing parts were easy.
Our only complaint? Our microphone was on the whole time we were using this software. Now it makes sense that both webcam and mic are on while recording. But once the recording is done, the webcam goes off, but the microphone remains on. This might be a privacy concern for many, and it will be great if Wondershare fixes this in their next update.
Update (28 Oct 2020): Wondershare responded and they are checking the issue and notified us that it will be fixed shortly.
Overall, using the software is a pleasurable and user-friendly experience, and we definitely recommend our users to use it.