With around 1.5 million monthly active players, Valorant happens to be one of the most popular video games in today’s time. It is a first-person shooter game with the best features and graphics.
Although Valorant is a PC game, it is not compatible with Mac. It is primarily designed for the Windows platform, which means Mac users can’t access the game on their devices.
But don’t worry, there’s a way to help you play Valorant on your Mac, and that too without downloading any third-party application. This can be done using the official Apple Boot Camp (Not available for newer Apple Silicon M Series Chips), which allows you to run both macOS and Windows on your Mac.
Is it possible to Play Valorant on Mac?
Unfortunately, Valorant doesn’t have a version that is compatible with Mac. You can play it only by installing Windows on your Mac computer.
While there are several ways to run Windows on Mac, Valorant will work only if you install Windows using Boot Camp. This is because Valorant uses the Vanguard anti-cheat tool, which is supported only by Boot Camp. So if you use other virtual machines to run Windows on Mac, Valorant will not work.
Vanguard is kernel-level anti-cheat software. Sometimes it creates issues for Windows users as well.
Also read: 7 Best iOS Emulators for Windows & Mac
Can you Play Valorant on M1 & M2 Macs?
Newer Apple Silicon M Series chips do not support Valorant. That is because it doesn’t support Boot Camp. This means you cannot play Valorant on the newer chip.
If you think of using a different virtual machine such as Parallels, it won’t work because it doesn’t support the Vanguard anti-cheat software that is needed by the game.
Since Boot Camp is supported only by Intel Macs, you can play Valorant only on Intel Mac devices.
Steps to Play Valorant on Mac
Now that you have an idea of the Mac computers that will support Valorant, it will be easier for you to figure out if your device is one of them. The method we are about to discuss is only for Intel Macs. So unless you own an Intel Mac computer, don’t expect these steps to work on your device.
Before following the steps, ensure that you meet the given requirements. To play Valorant on Mac, you will need these things:
- Latest macOS updates
- Windows 10 Pro or Windows Home 64-bit version on a disk image
- 64GB or more storage space on your device’s startup disk
If you have all the things that are required to play Valorant on Mac, follow these steps:
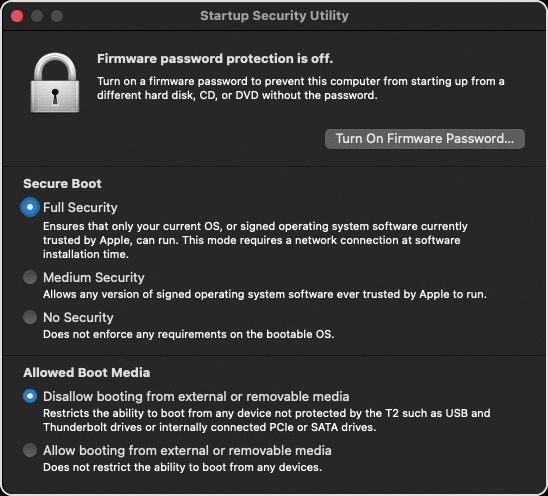
1. Check your Secure Boot Setting
Start by checking the Secure Boot setting. Ensure that it is set to Full Security, and then only proceed to install Windows.

Once the Windows operating system is installed, you can change the setting as per your requirement. This will not affect the ability to start up Windows.
2. Create a Windows Partition using Boot Camp Assistant
The next step is to create a Windows partition. This can be done with the help of a Boot Camp Assistant, which can be found in the Utility folder.
Follow the instructions shown on the screen. If you are asked to plug in a USB drive, insert it into your Mac. This will enable Boot Camp Assistant to create a bootable USB drive for installing Windows.
It will then ask you to set the Windows partition size. Keep the storage-space requirement in mind before acting on it. You must set the partition size as per your requirement. There’s nothing to worry about, as the partition size can be changed later if needed.
3. Format the Windows Partition
Once the above steps are done, your Mac will restart the Windows installer.
If you are asked to select the Windows installation location, choose Boot Camp partition and click Format.
In most cases, the Boot Camp partition is formatted automatically.
4. Get Windows Installed
Before proceeding with this step, remove all external devices that are not needed during the installation process.
Click “Next” and follow the instructions shown on the screen. This will help you to complete the installation successfully.
5. Use the Boot Camp Installer on Windows
Once the Windows installation process is over, your Mac will start up in Windows. It will show a window with the title “Welcome to the Boot Camp installer.”
Follow the onscreen instructions, and the Windows drivers and Boot Camp will be installed on your device.
When done, you will be asked to restart the system.
Note: You can switch between Windows and macOS any time you want. All you have to do is press and hold the Alt or Option key during the startup. When you are not playing Valorant on your Mac, you can switch back to macOS.
6. Downloading Valorant on Mac
After successfully installing Windows on your Mac, you are all set to download and launch Valorant on your device.
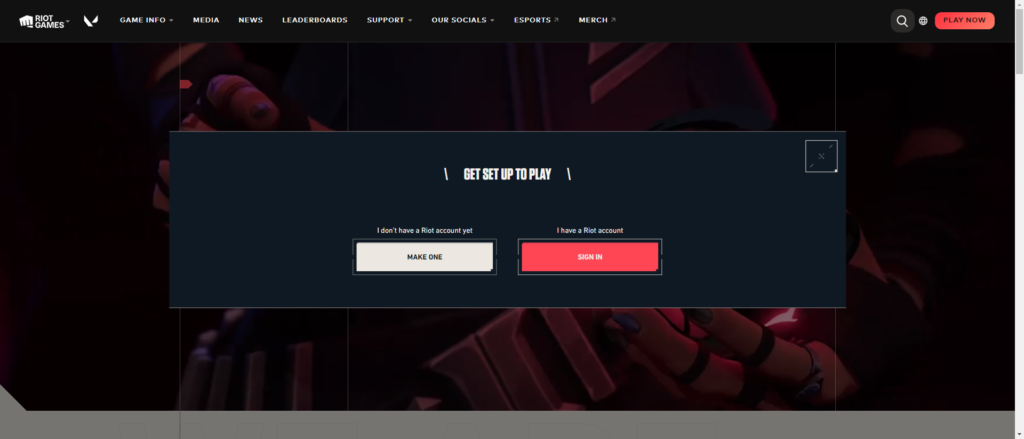
- Visit the official website of Valorant. You will see the options “Play Free” or “Play Now.” Click on any of them.

- You will have to create a Riot Games account. This is only for those who don’t have an account.

- Your browser will start downloading the game file.
- Click on the downloaded file and select a download location. Remember, you at least need 8GB of free storage space to install the game.
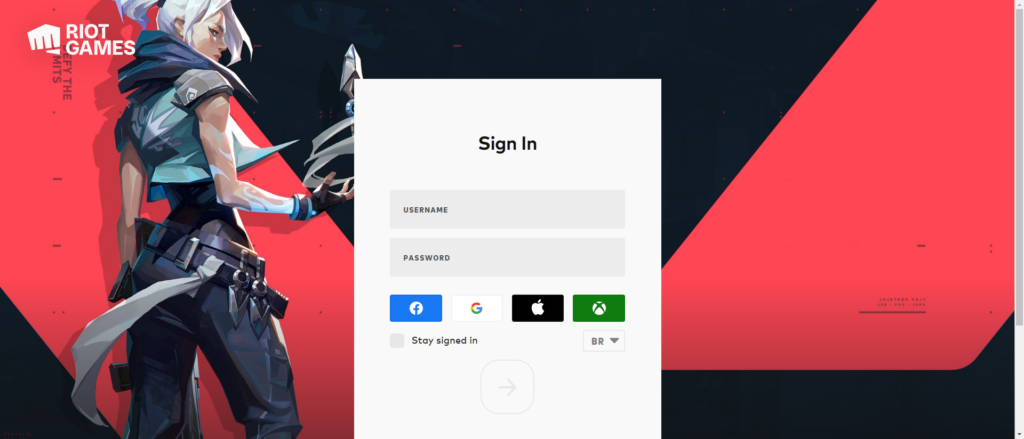
- You can start playing the game after logging into your Riot Games account.
- You will see a new icon on your Mac which is for launching the game. Alternatively, you can also use the Windows search bar to find and open the game.
Steps To Create Riot Games Account
- Visit the official website of Valorant.

- Locate the “Play Now” option and click on it and select “Make One”.

- A new page will open, where you will be asked to sign-up.

- Enter your email ID and hit the “Start” button to proceed with the registration.
- You are required to enter details such as username and date of birth.
- Once you fill up the blanks, set a password for your account.
- After everything is done, confirm the registration, and your account will be ready.
- You can use your username and password to log in to your account whenever you like.
Playing Valorant on Mac is more complex than on Windows. Instead of being able to download the game directly on your device, you will have to take the long route. However, if you follow all the steps correctly, it will take little time to complete the process.
Also read: 6 Best Windows Emulators for Mac
Frequently Asked Questions (FAQs)
What is Valorant?
Valorant is a first-person shooter game developed by Riot Games. It is available for free to play.
Why can’t I play Valorant on Mac?
Valorant is mainly developed for the Windows platform. It doesn’t have a version that is compatible with Mac. To play it on your Mac, you must first install Windows OS on your device.
How to play Valorant on Mac?
Valorant can be played only on Intel Mac computers with the help of Boot Camp.
Can I use any virtual machine to install Valorant on Mac?
To play Valorant on Mac, you must use only Apple Boot Camp as it supports Valorant anti-cheat software, which is needed by the game to run.
How much does Valorant cost?
Valorant is a free game, so it doesn’t require you to pay any money.
Do I need to create a Riot Games account to play Valorant?
If you are a new player, you must first create a Riot Games account to play Valorant.
What platforms does Valorant support?
Valorant is only compatible with the Windows platform. To play it on Mac, you will need to use Boot Camp.
Can I play Valorant on M1 or M2 Macs?
It is not possible to play Valorant on M1 and M2 Macs. This is because these new Mac models don’t support Boot Camp, which is needed to install Windows.
Is Boot Camp safe to use for installing Valorant?
Boot Camp is an entirely safe tool by Apple. You can use it to install Valorant on your Mac computer.
Is Valorant an online game?
No, Valorant is not an online game. It is a PC-based game.
