If you have been following us closely, you already know we published an article on this topic but for Windows a while ago. We realized that due to the increasing number of Mac users, it deserved a separate tutorial, so here we are.
As per Wikipedia and other sources, the origin of the Indian Rupee, internationally known as INR, dates back to circa 6th century BCE. Until 14 July 2010, the Rupee Symbol was basically “Rs.” However, on 15 July 2010, the Indian Government introduced the new symbol ₹.
The symbol has emerged from combining the Devanagari letter ‘Ra’ and the Roman capital letter ‘R’. Its appearance consists of two horizontal lines resembling the national flag and the mathematical ‘equal’ sign. The rupee symbol is placed before the number without any space in between.
Sourced from https://techrrival.com/how-to-type-rupee-symbol-on-windows/
There are majorly two ways using which you can type Rupee symbol on Mac.
Pro Tip: If you don’t use the Rupee Symbol frequently, we recommend copying & pasting the symbol below to save time.
₹Method 1: Using Built-in Emoji & Symbols
- Open the application where you want to type the rupee symbol. For the sake of this tutorial, we are using the inbuilt TextEdit app.
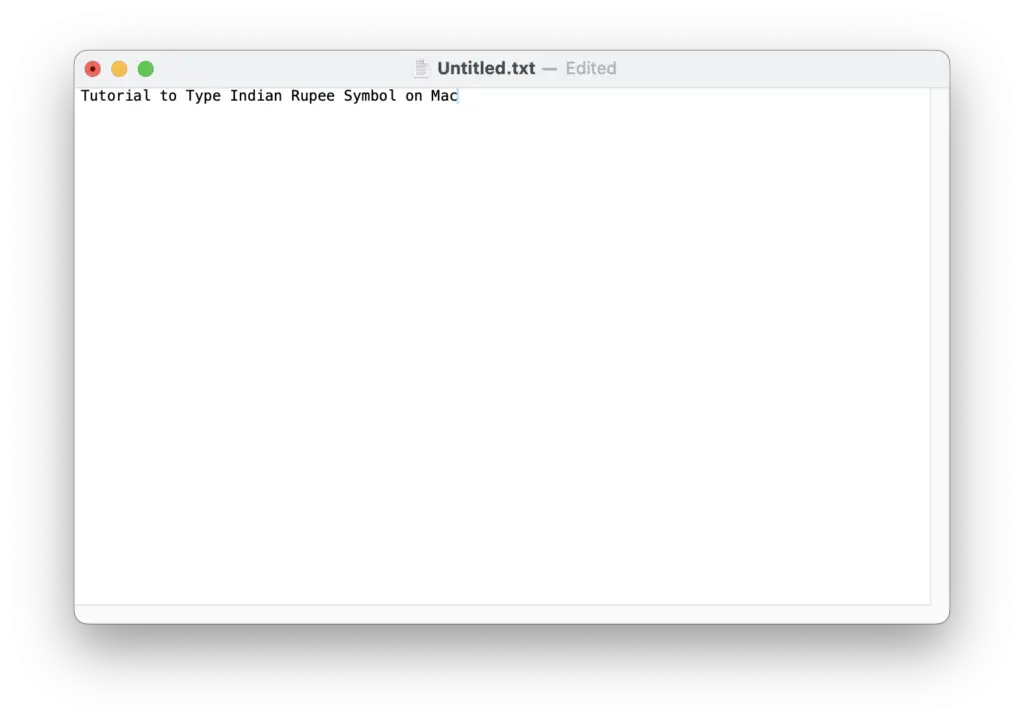
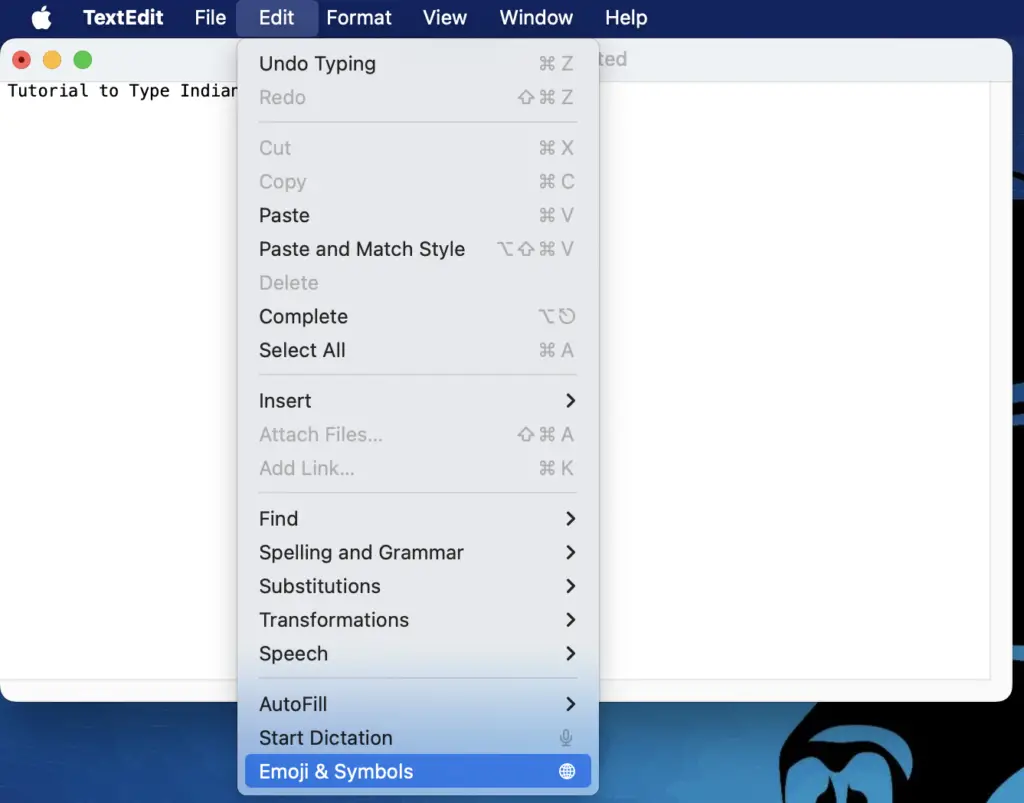
- Press the Globe or Fn button on your Macbook keyboard. Alternatively, you can go to the Menu Bar and select Edit -> Emoji & Symbols.
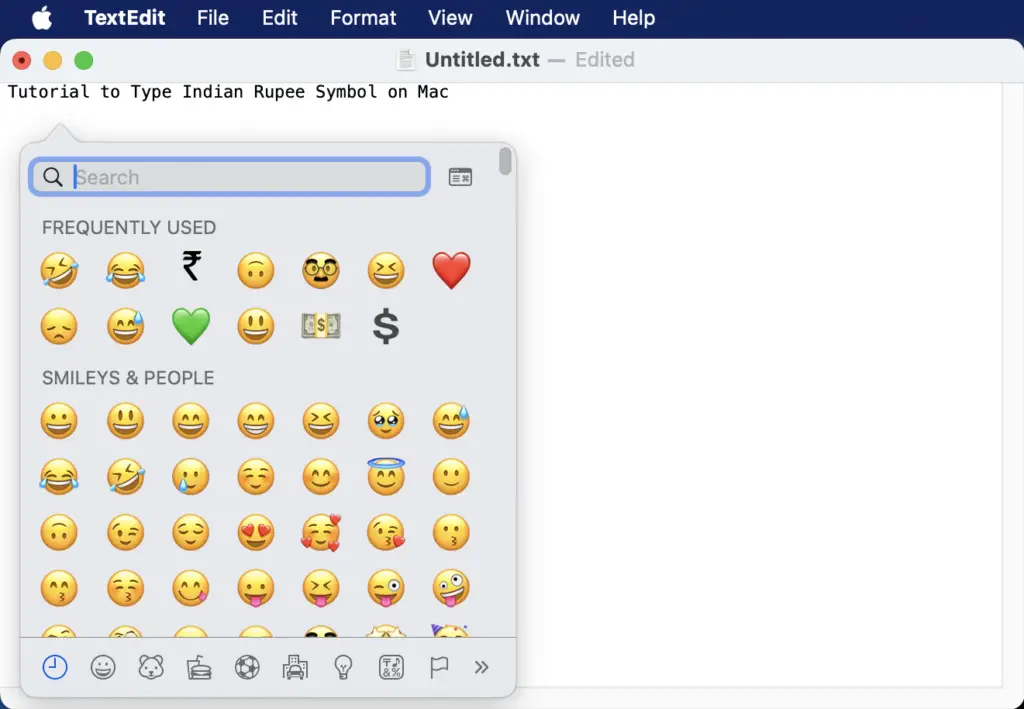
- You will be greeted with all the emojis and symbols available on the Mac.
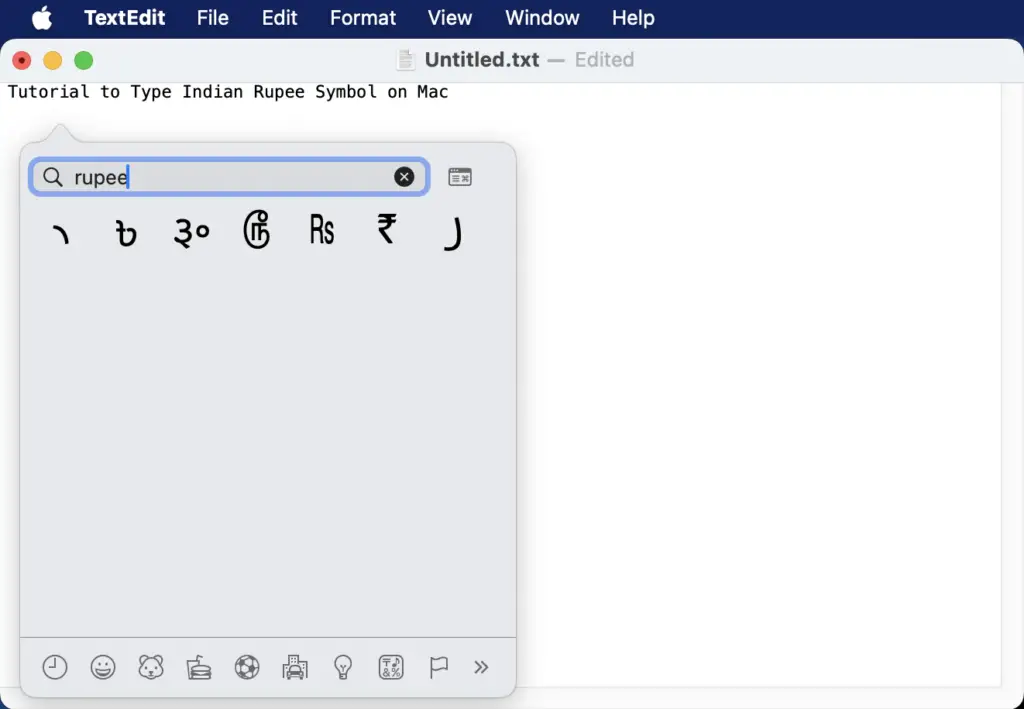
- Now search for ‘Rupee’ and Select the ₹ Symbol.
- It’s done.
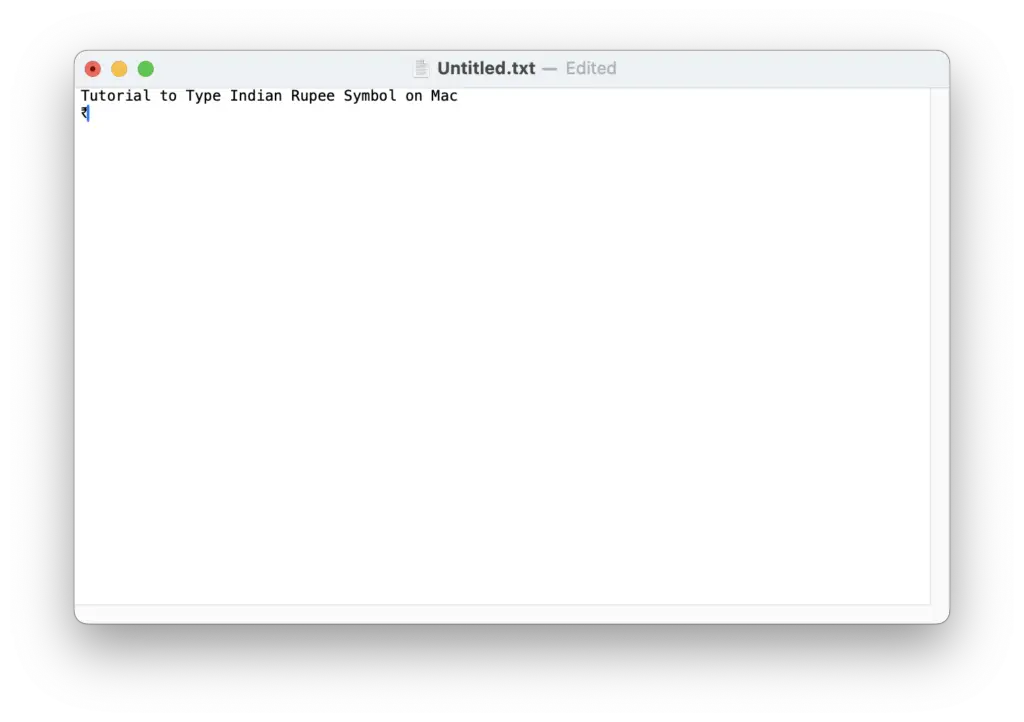
Adding ₹ to Favorites of Emoji & Su
If you frequently use this ₹ symbol, you can add it to your favorites so it always shows up at the top. Follow the instructions below.
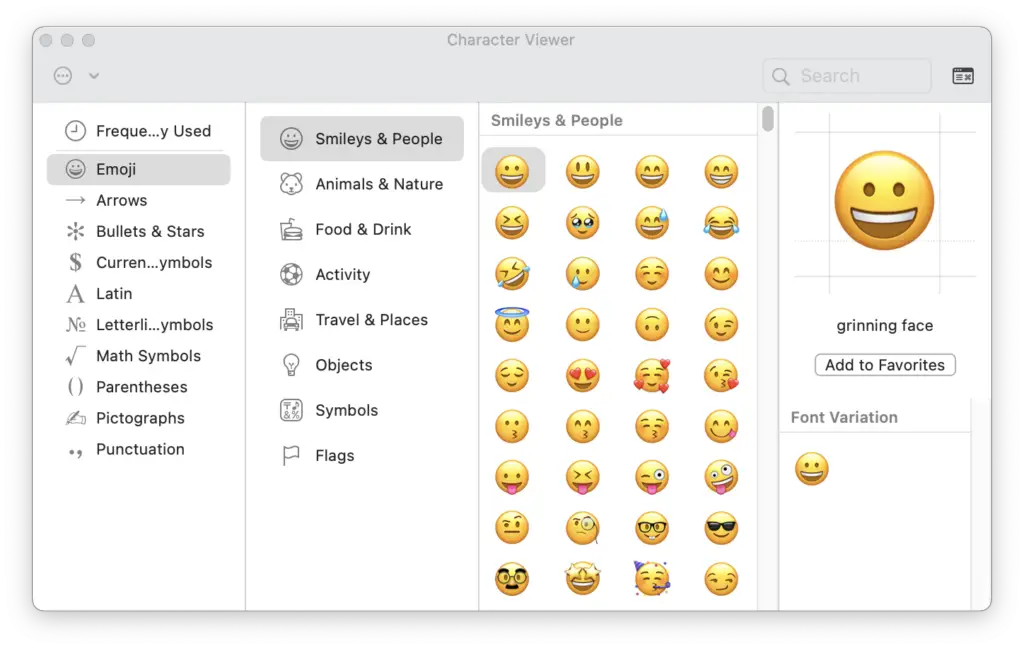
- Repeat till step 2 in the tutorial above. Tap the icon opposite to the close button on the right side.

- This will open the character viewer.
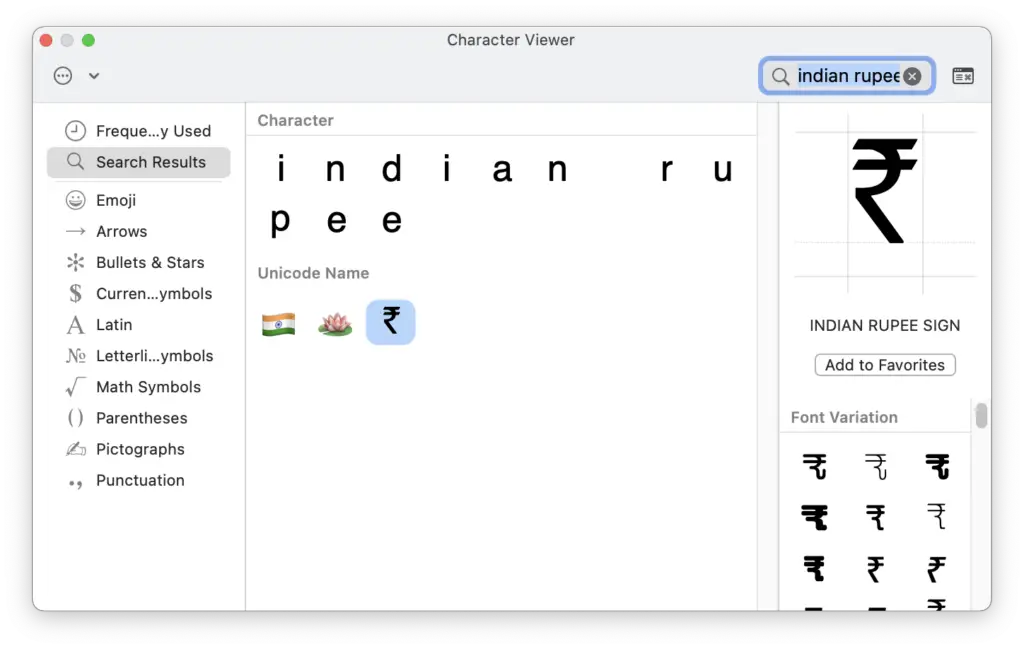
- Now search for ‘Rupee’. Select it and click the button ‘Add to Favorites.’
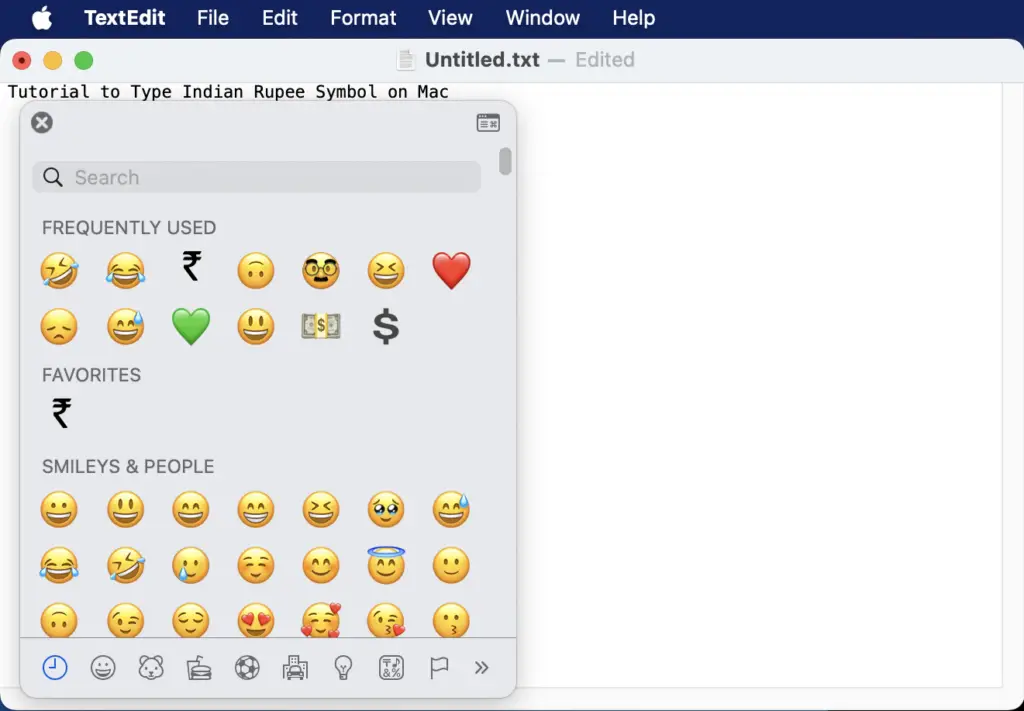
- To close the character viewer, tap the button near the search bar. Now you will have a new favorite section in the emoji & symbols selector with ₹ symbol.
Method 2: Using Keyboard Shortcut
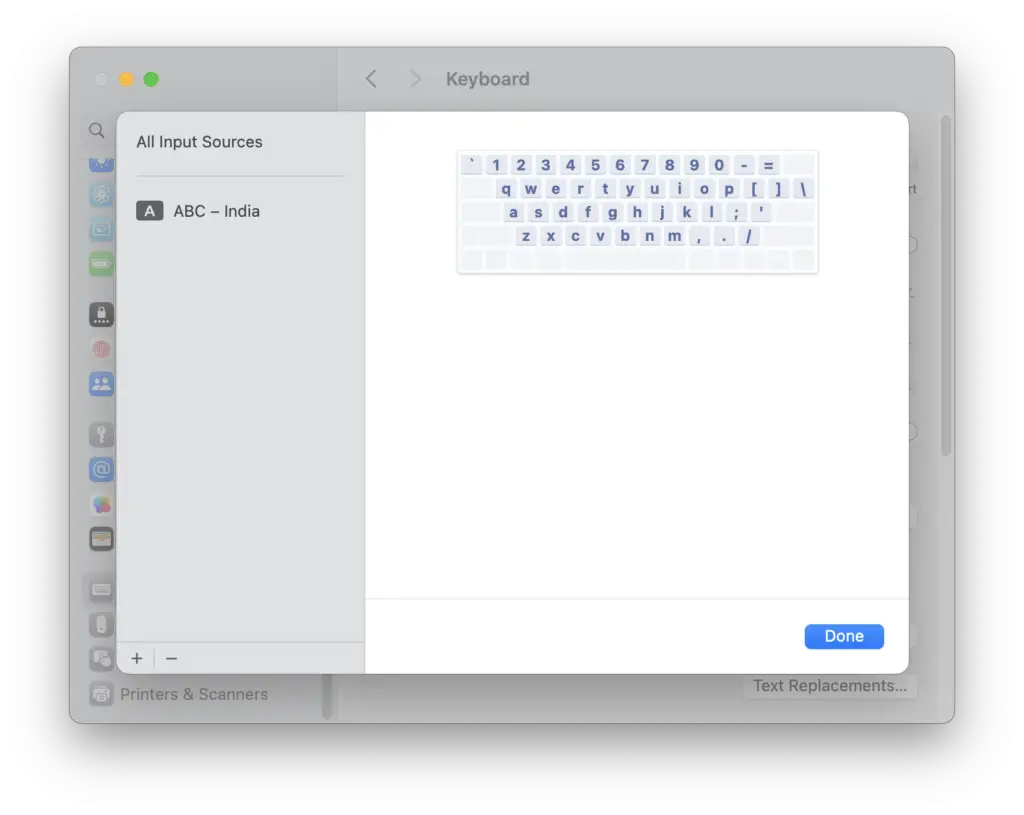
- Open System Settings on your Mac. Scroll down until you select the Keyboard Menu on the left pane.
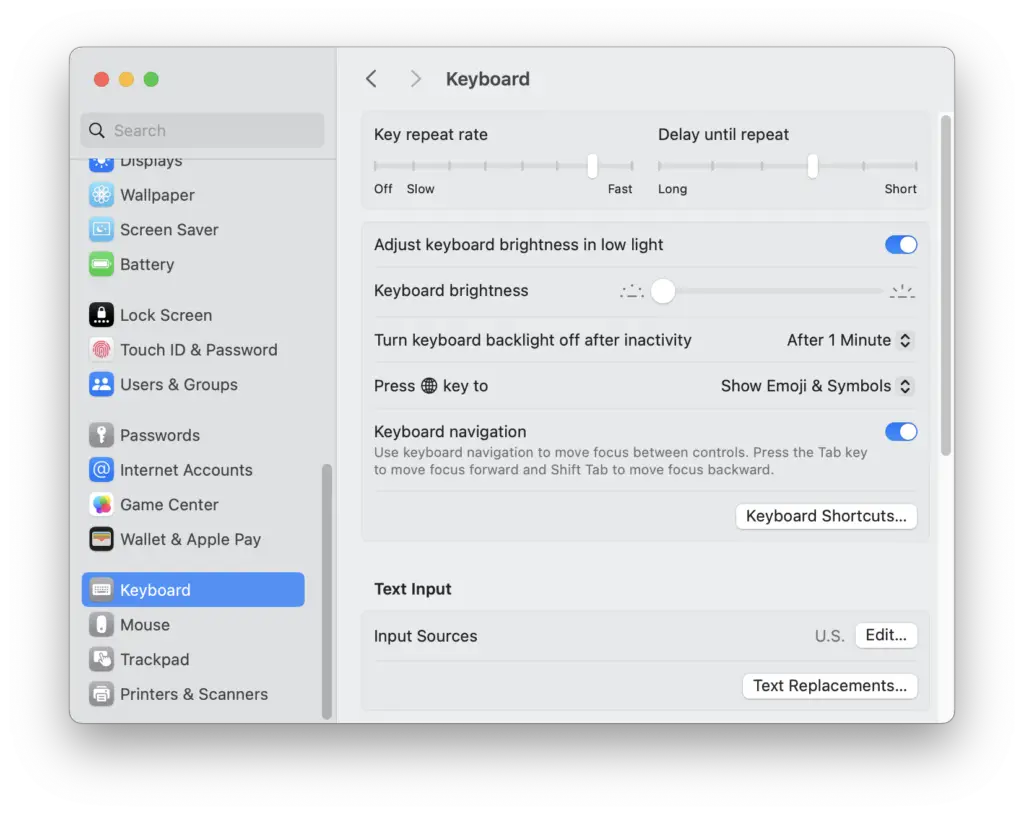
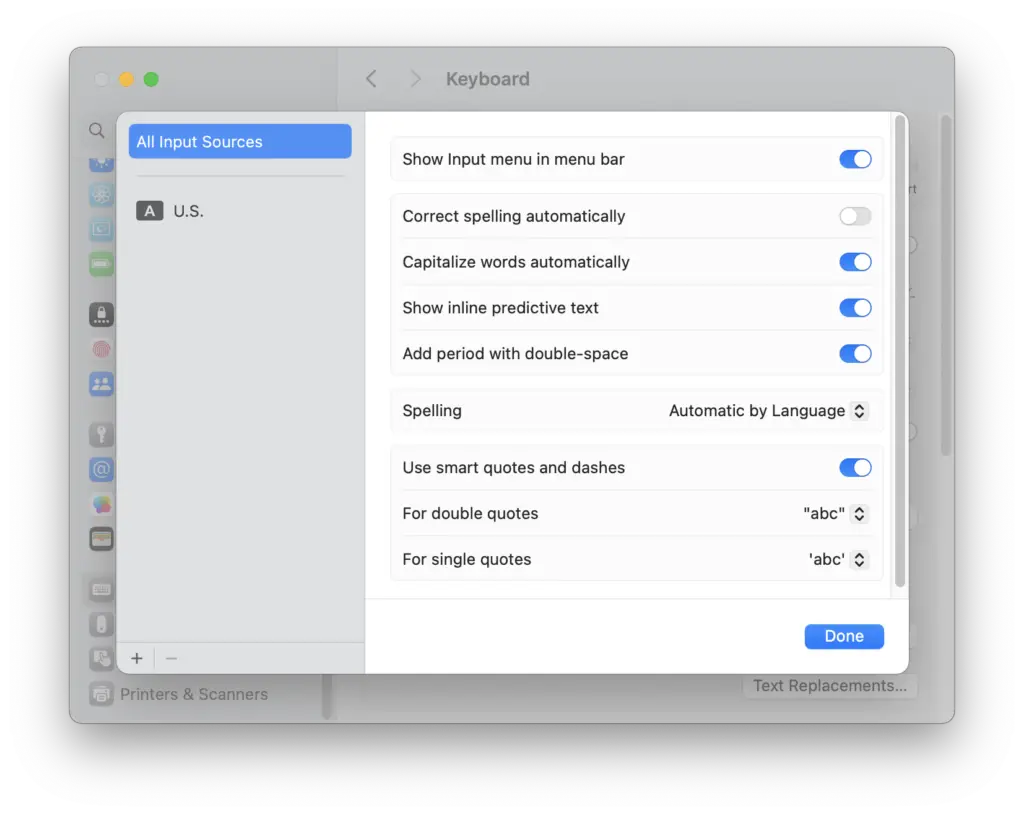
- Go to Input Sources and tap the Edit button.
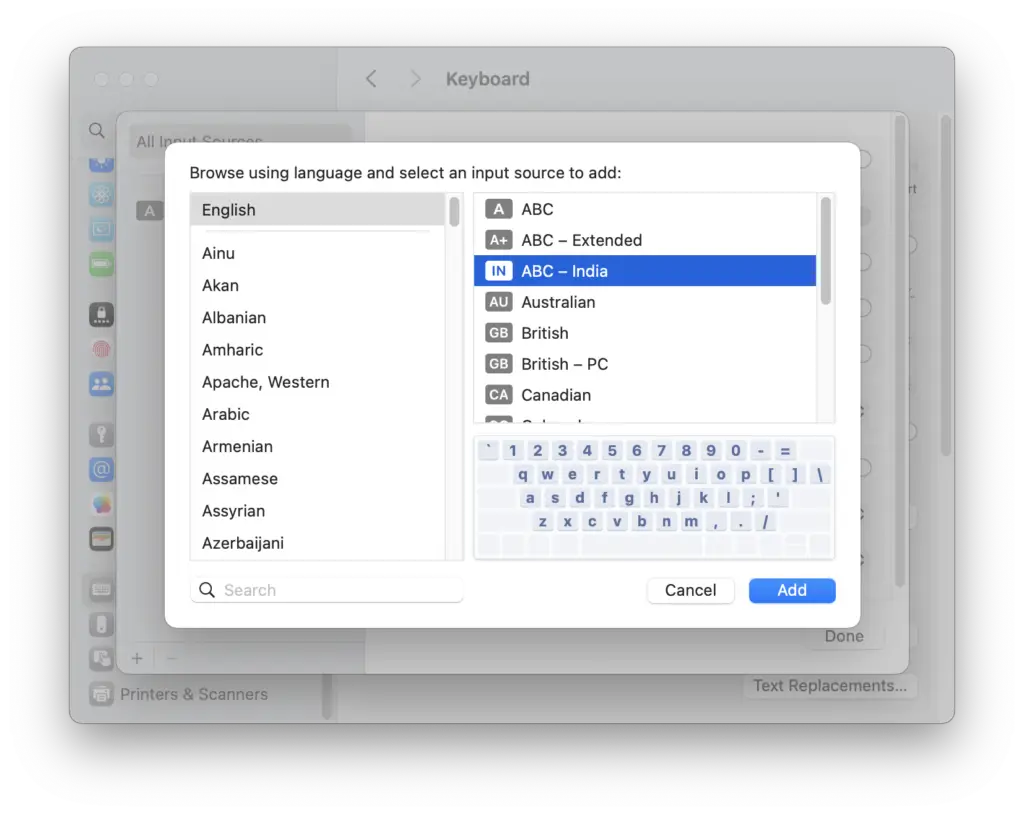
- Tap the + Sign.
- Search for ABC – India, and tap the Add button.
- It’s time to remove the US language from the keyboard menu. Select it and tap the – button.
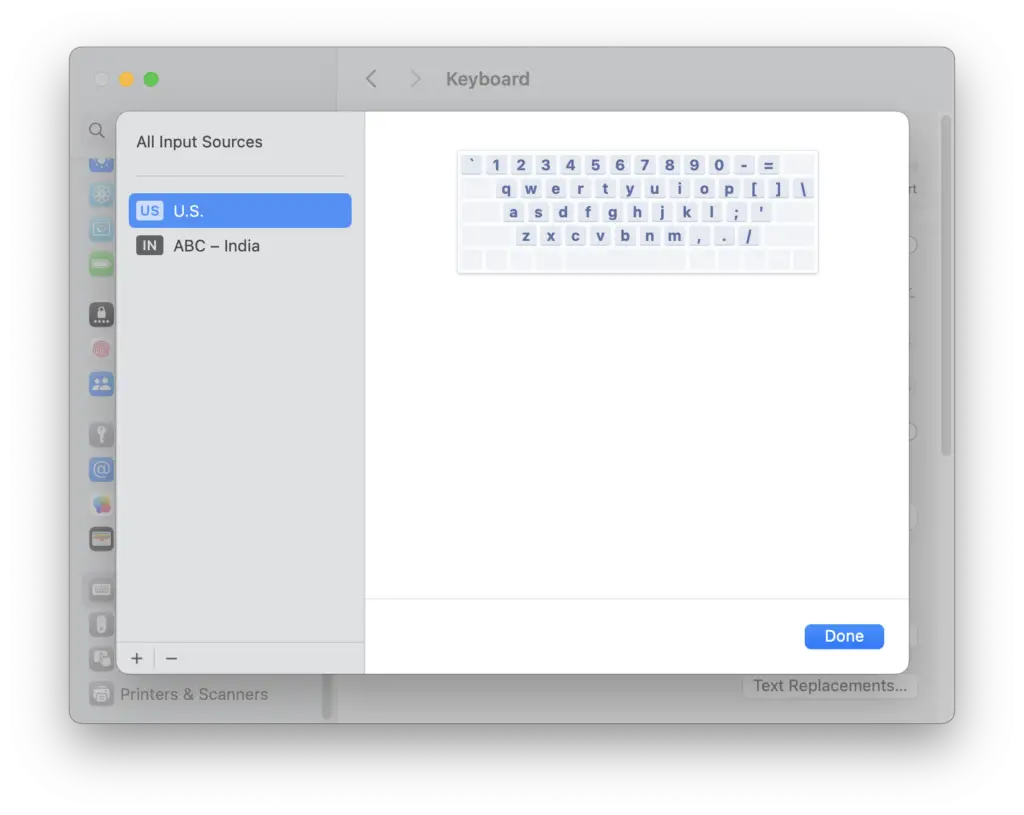
- Tap done. To print the ₹ symbol anywhere, you just need to press Option Key + 4 or Option Key + $.
So that was all for this tutorial. We have discussed two methods here, but according to us, if you have to use the India Rupee symbol ₹ very frequently, Method 2 is the best way to proceed.
Apart from that, if you are facing any difficulty with the tutorial above, feel free to ask us in the comment section below. We will try our best to reproduce the issue and provide you with the best solution.
