Windows allows users to add multiple users in a single computer so that one can easily share a system without having to log in and out multiple times. This is great for work and at home. But what if you want to remove the Microsoft account of someone who doesn’t use it anymore?
Worry not, as it is quite easy to do so. Follow the below steps to remove Microsoft account from Windows:
-
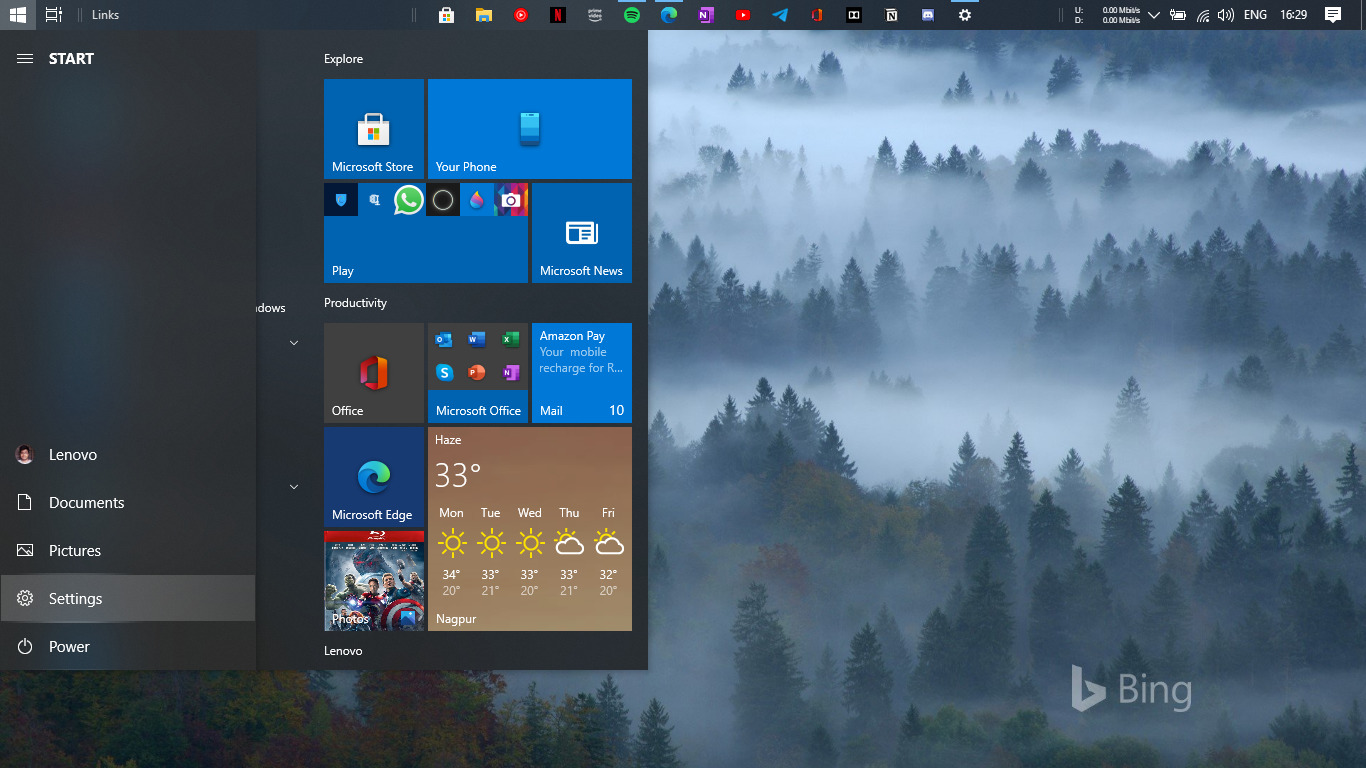
Open Settings on Windows

Click on the Start button and on the bottom left, click on the Settings icon to open Settings.
-
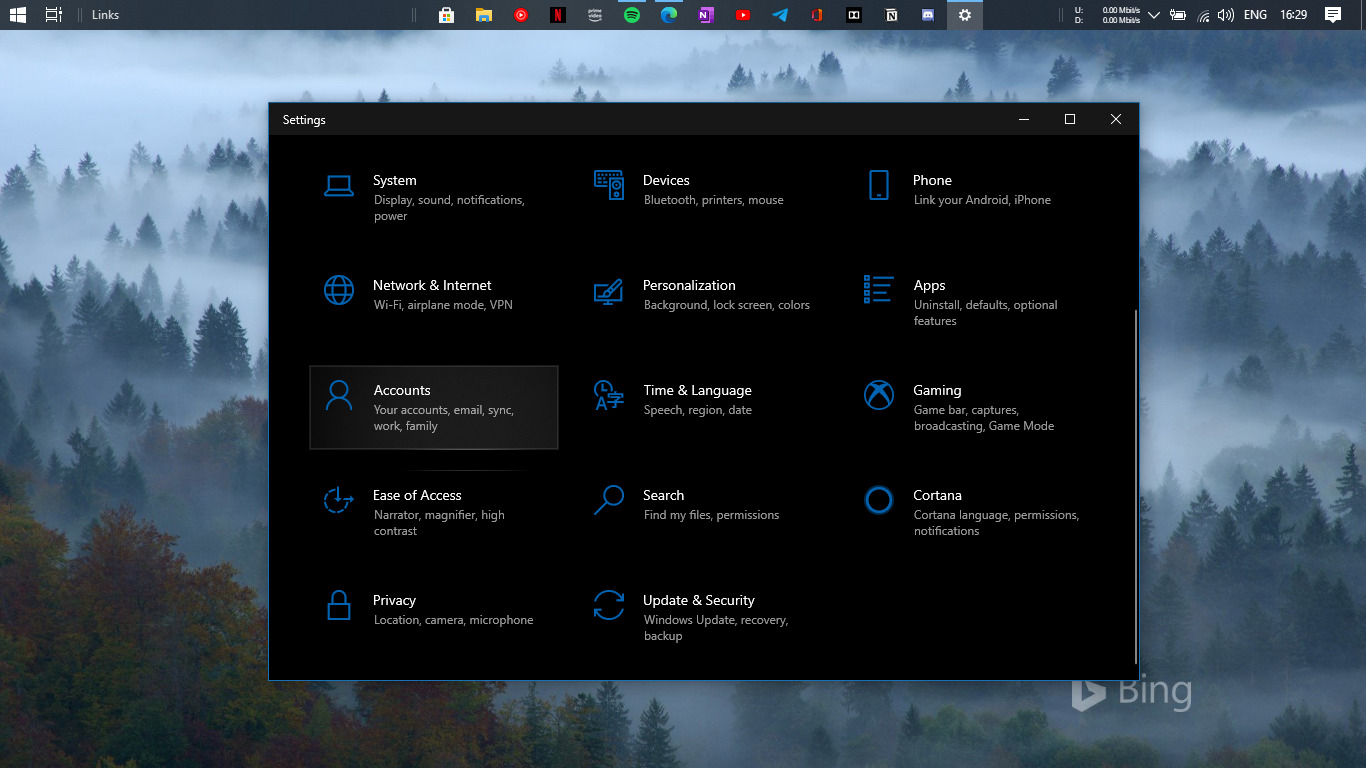
Go to Accounts

Now click on the Accounts option. Under Accounts, you will find ‘Family and other users’. Click on that. This will show you accounts of your family members as well as other members that aren’t part of your family.
-
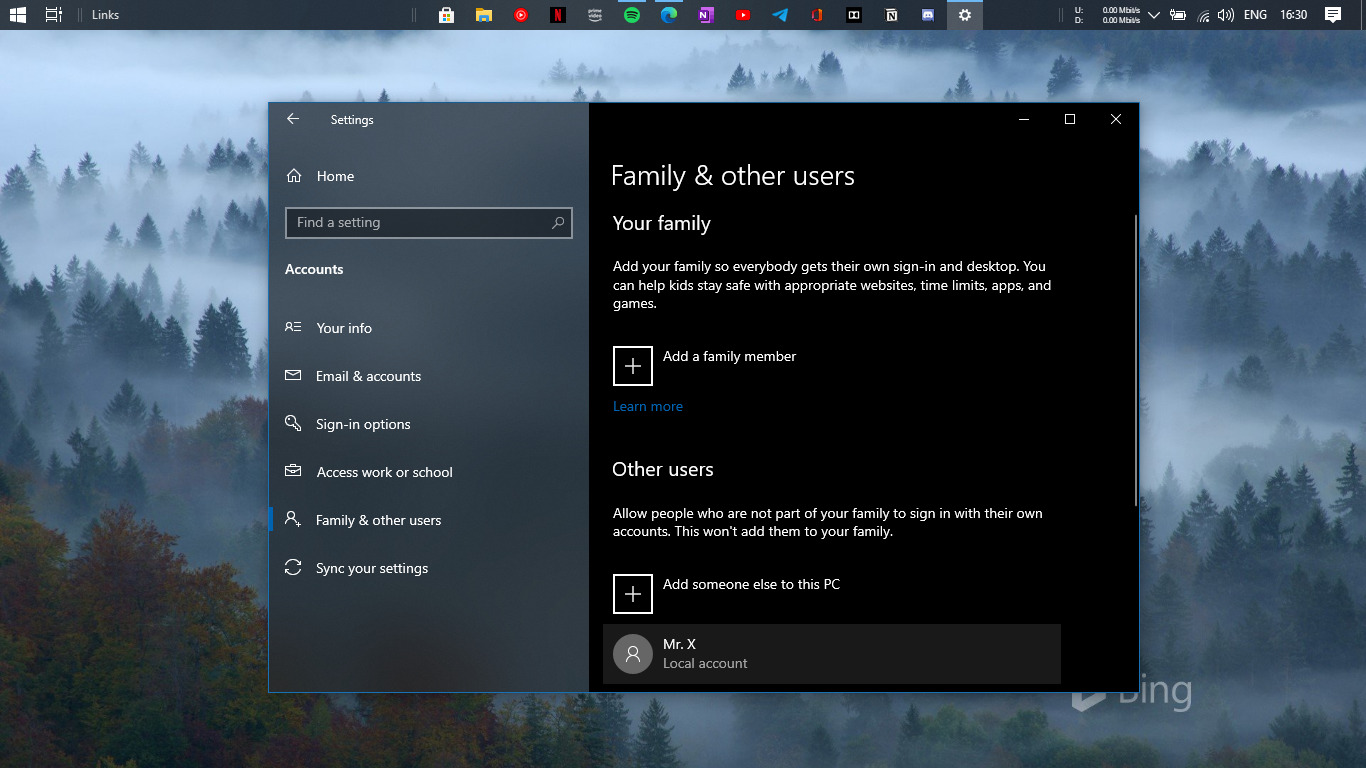
Removing Account – First Step

For this demo, we are going to remove “Mr. X” from our computer. Even though Mr. X has a local account, this step is the same for people that are signed in with their Microsoft Accounts.
-
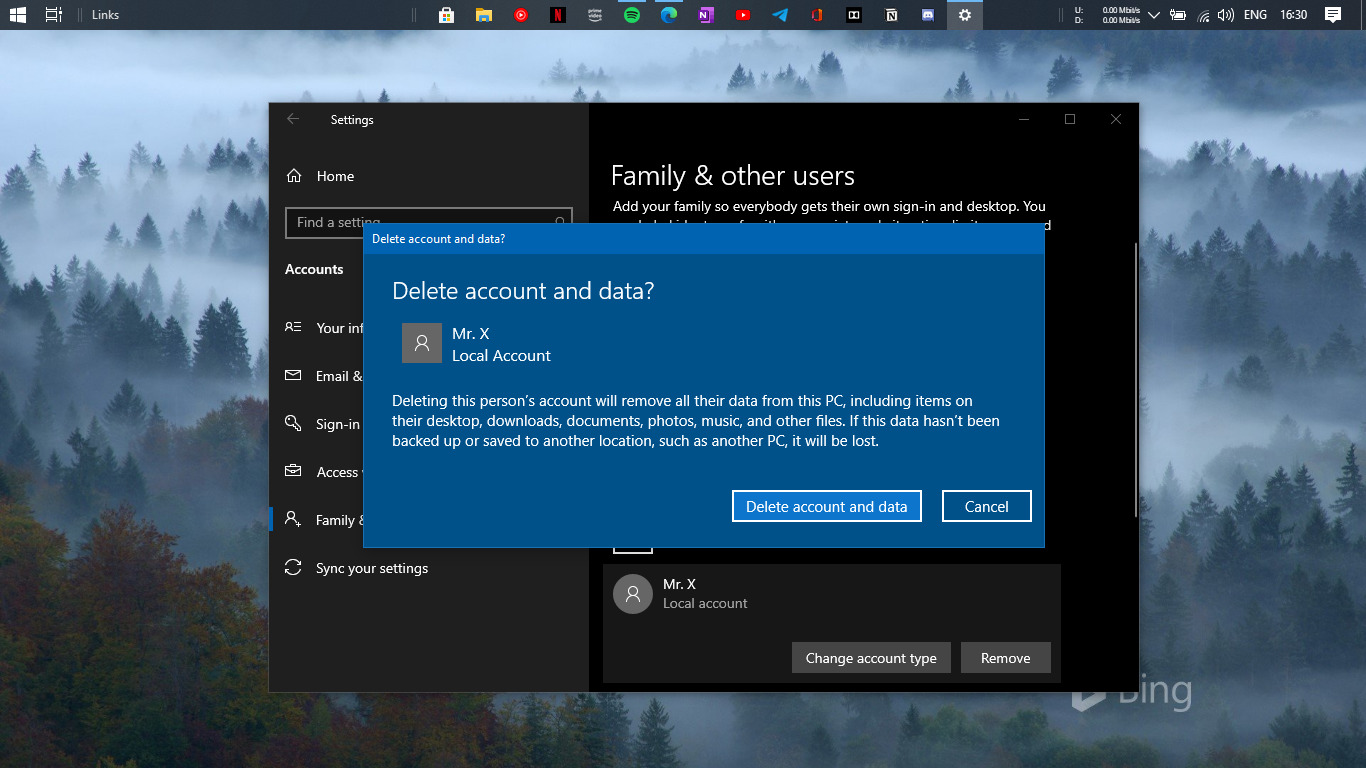
Removing Account – Final Step

Now click on the user you want to remove and click “Remove” button on the right side.
Note: This step does not delete data stored on Microsoft’s servers, such as files on OneDrive, Windows 10 personalization settings, app purchase, and more.
Congrats! You have successfully removed a Microsoft account from your Windows PC.
Also read: Best Windows 10 Themes and SkinPacks

