If you have just set up your new PC build or updating your old PC to a newer Windows version, you may need a bootable Pendrive which has got the Windows Operating System on it. A USB boot is a process in which computer hardware can be enabled to get all essential system booting information and files instead of a hard disk or a CD drive.
How does USB Boot work?
USB Boot works the same way a floppy disk was earlier used to boot a computer up. It is mostly used to repair, recover, or install an operating system from scratch. To perform a USB boot, first, you would have to create a bootable USB device.
This can be done using your own PC or other third-party utilities. Then the software will copy all the operating system files and boot the sequence into the USB drive/pen drive to enable the USB boot. In order to create a bootable USB, you would need a USB drive/pen drive with a minimum of 8 GB of storage.
The Pendrive first needs to be completely formatted before the procedure.
Formatting the USB Drive (using diskpart)
- First, you have to run cmd (Command Prompt) as an Administrator. This is an important step because you are going to edit disks that require admin privileges. There are several ways to open a command prompt with admin rights:
- Press Windows + X and select Command Prompt (Admin).
- Open start menu, search cmd, right-click, and click run as administrator.
- Open task manager, click on File > New Task, tick on Create this task with Administrator privileges, type cmd and hit Enter.
- Connect your USB drive to your computer.
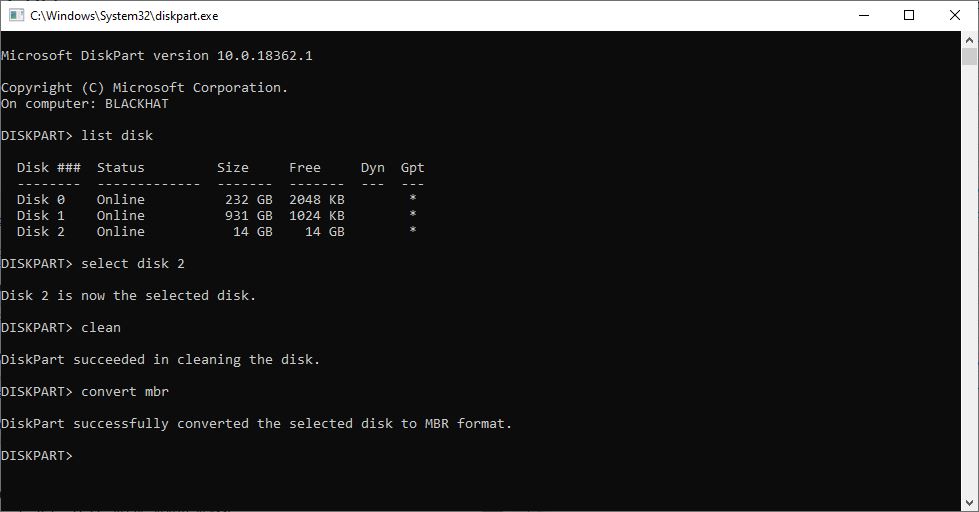
- Type “diskpart” and press enter. Doing this will open the windows inbuilt disk part utility which is used to manage the storage on your computer. Now you have to wait until the DiskPart utility starts running.
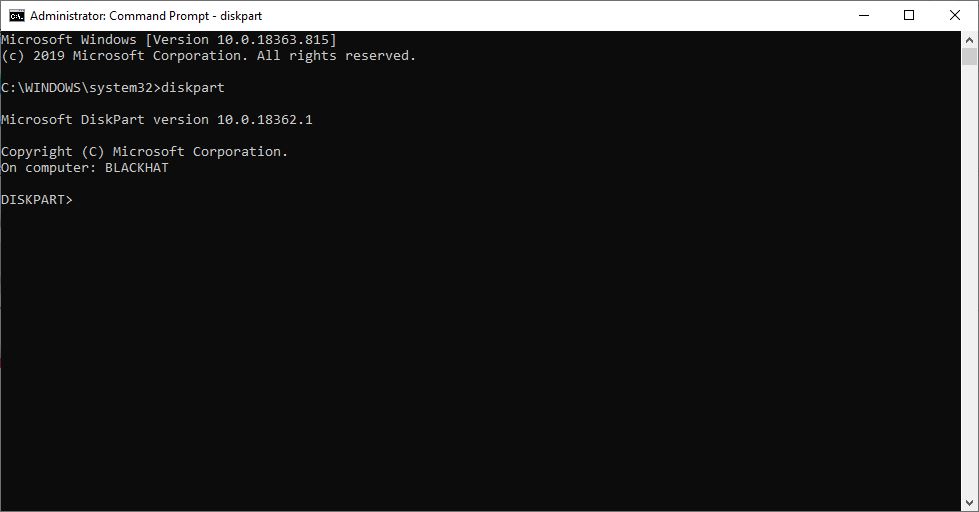
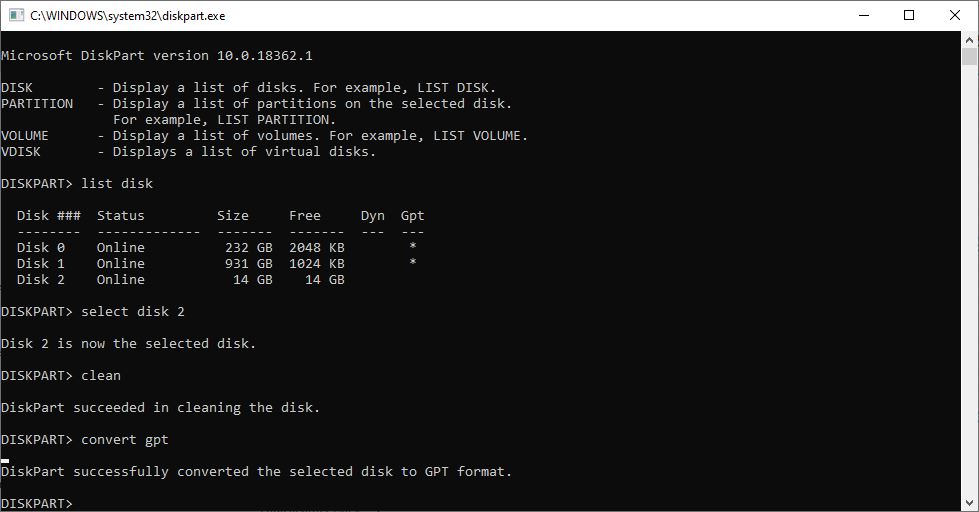
- In the new diskpart window, type “list disk” and hit Enter. It will display all the active disks present on your computer. Here, you will see several disks.
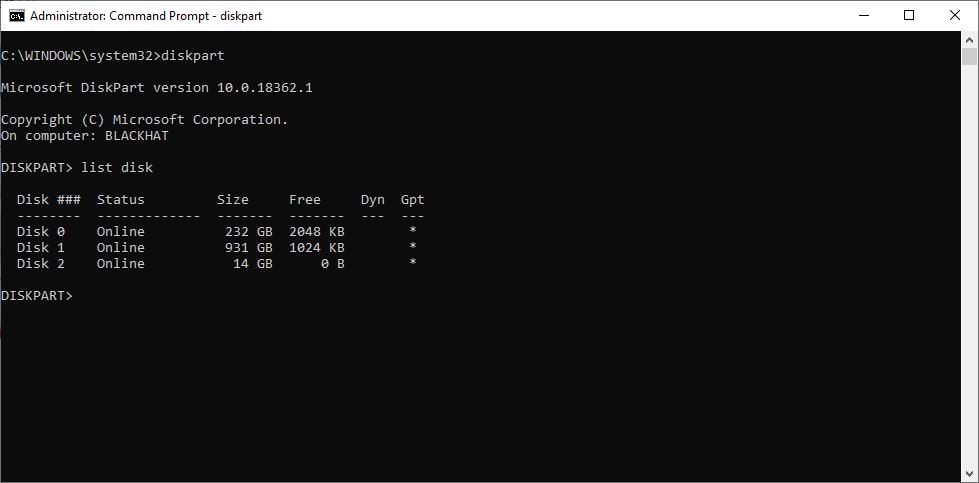
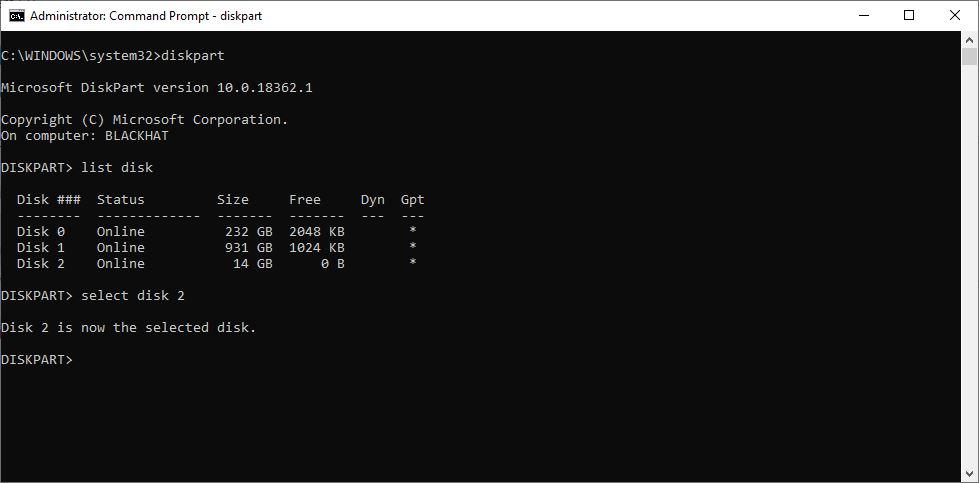
- Select the appropriate one based on the size of the disk. In our case, it is Disk 2.
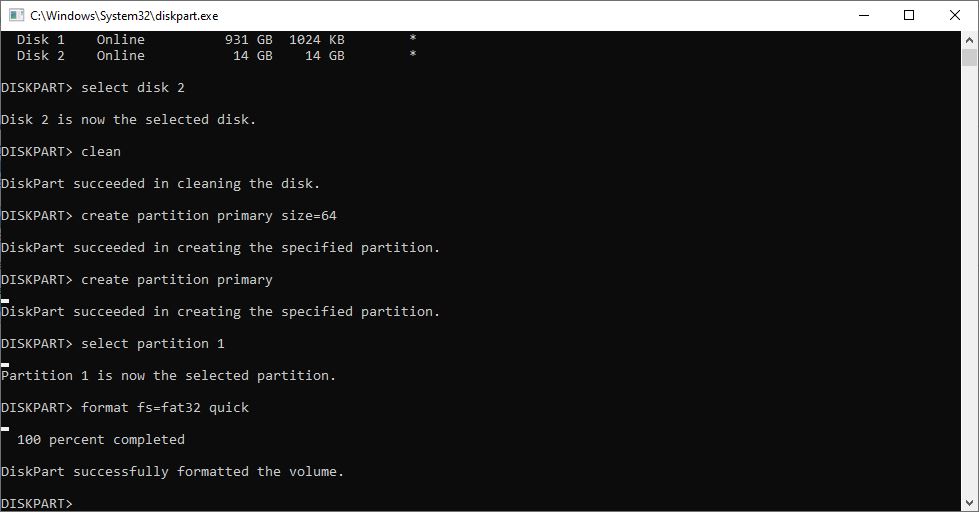
Type “select disk 2” in the same window and hit Enter. You will now get a prompt “Disk 2 is now the selected disk” That means any commands now will operate on Disk 2 directly.
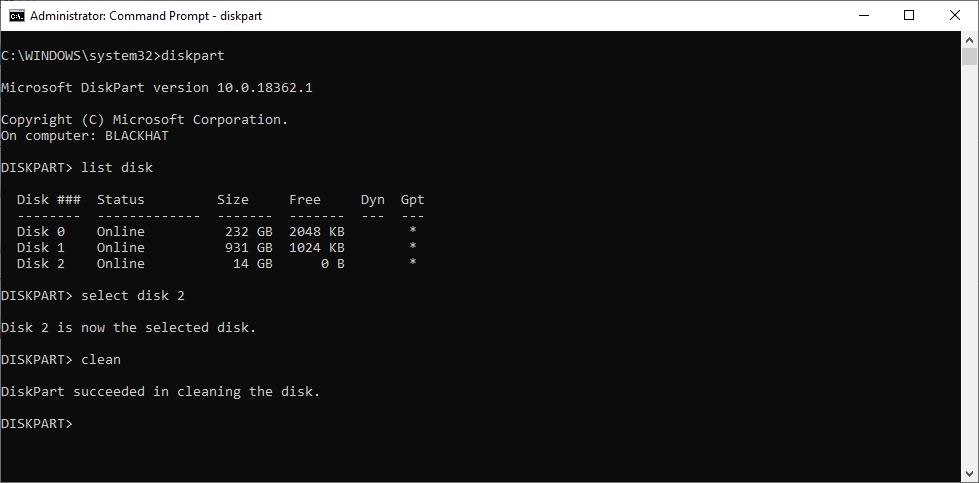
- Now, type “clean” and hit Enter to remove all of the data present in your USB drive. This command will completely format your USB drive. Now, you will get a prompt “Diskpart succeeded in cleaning the disk”.
- To convert the disk to MBR, type “convert mbr”, otherwise for GPT, type “convert gpt”. Use the recommendations provided below:
- For Windows 7 or earlier: Prefer MBR
- For Windows 8 or later: Prefer GPT
- For any other OS: Refer to the official guidelines
Note: The latest devices support UEFI non-CSM, however, if you are running it on an older device then your best bet will be to use MBR.
Creating MBR Bootable USB Drive (The Easiest Way)
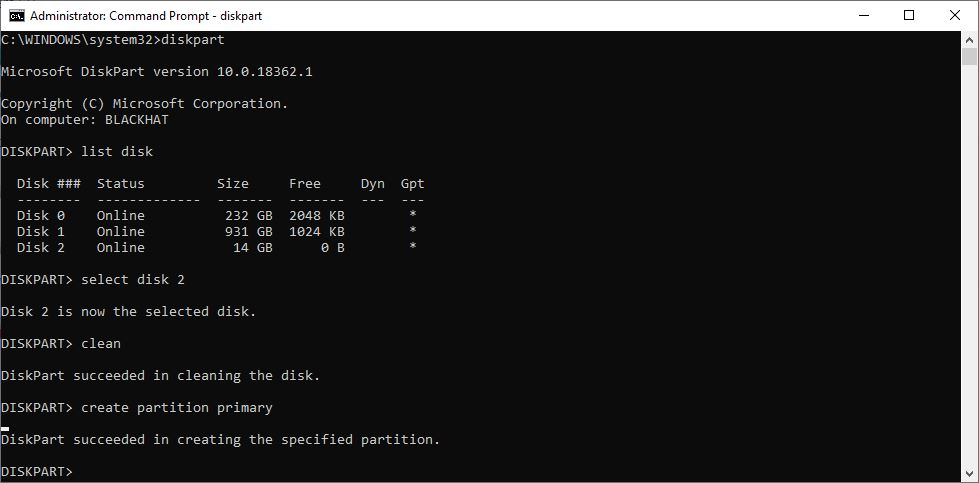
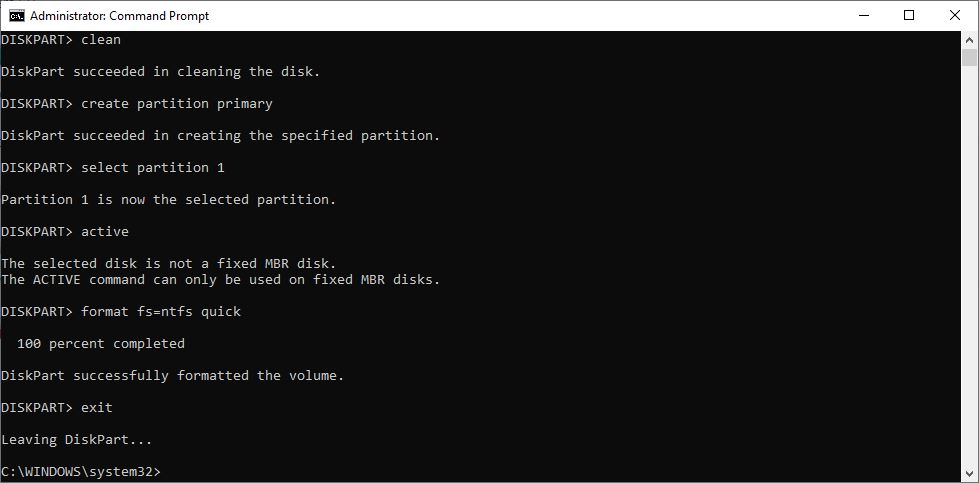
- Type “create partition primary” and hit Enter. You will now get a prompt “DiskPart succeeded in creating the specified partition.”
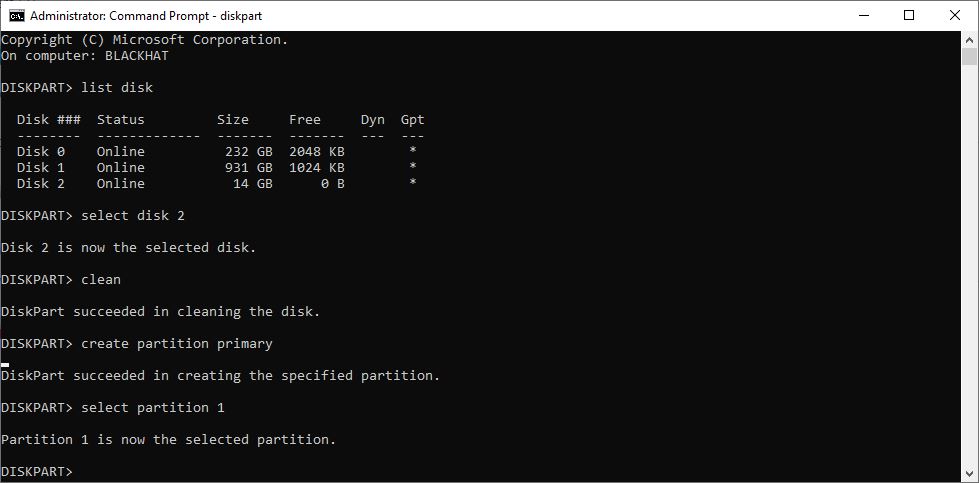
- Type “select partition 1” and hit Enter. It will choose partition 1 for setting up it as an active partition.
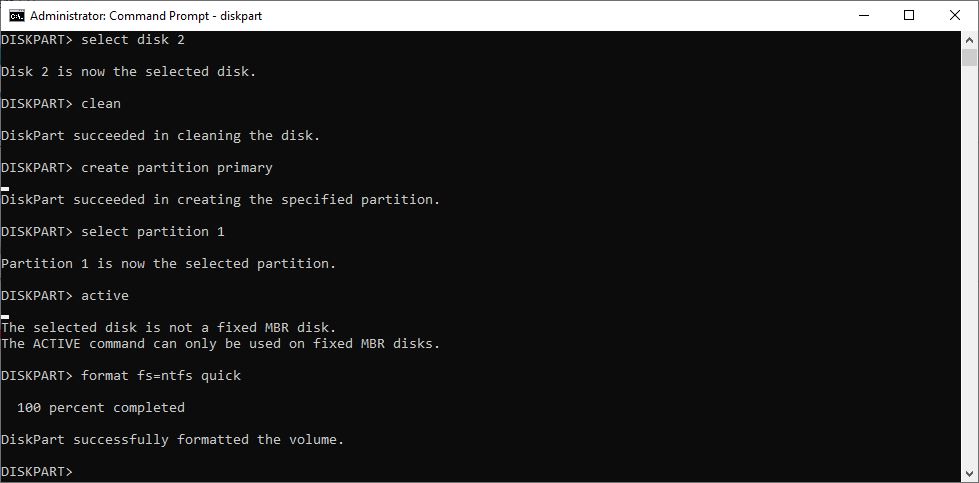
- Now, type “active” and hit Enter. It will activate the current partition for you to work on.
- Now you have to type “format fs=ntfs quick” and hit Enter. This command will finally format your current partition as an NTFS file system.
- To exit, simply type “exit” and hit Enter. The command will close the DiskPart utility but not the CMD window.
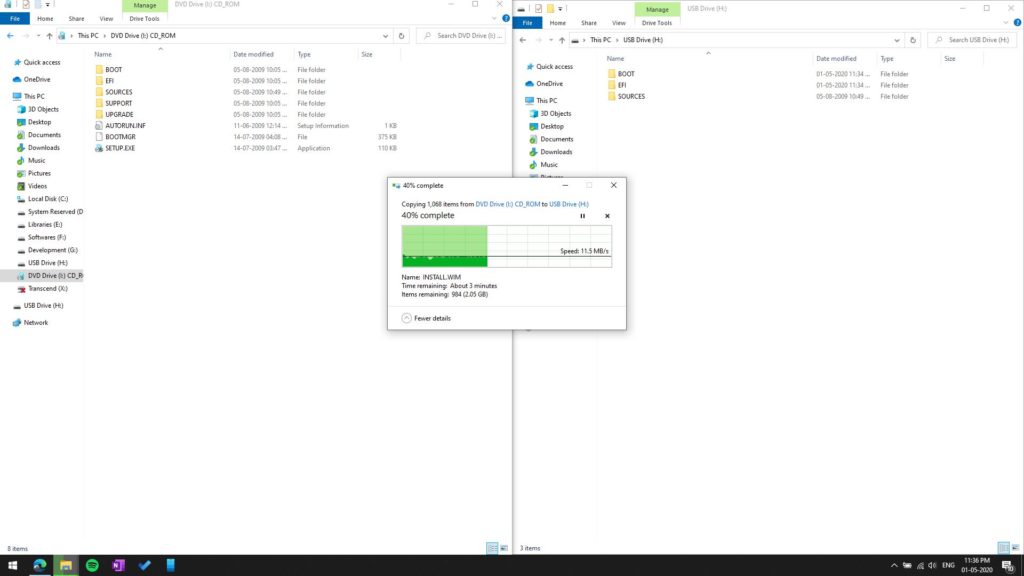
- Now that you have successfully formatted your USB Drive, It’s time to copy the data from the ISO Image present on your PC or a DVD to your USB drive. Doing this will successfully turn your USB flash drive into a bootable Windows USB drive.
Creating GPT Bootable USB Drive (The Advanced Way)
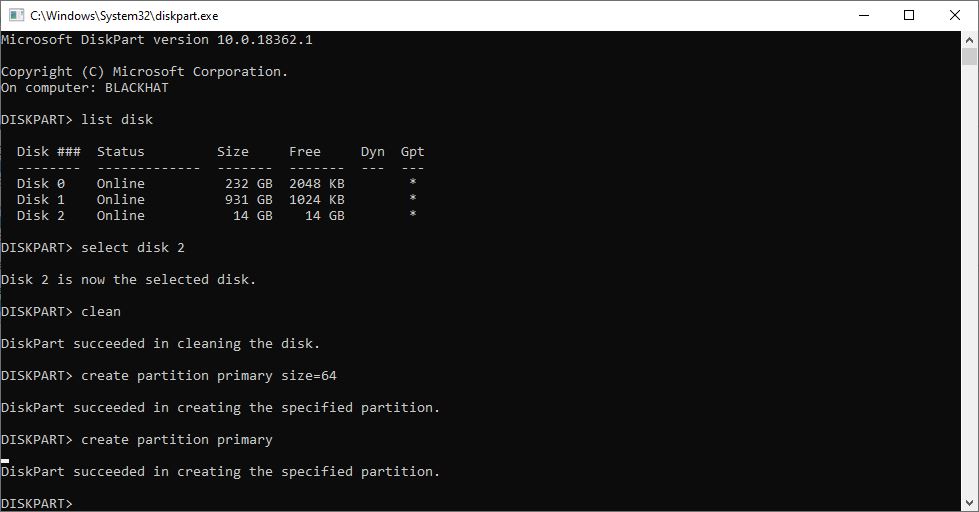
- Instead of a single partition to make an MBR bootable USB drive, here, you will need to create two partitions because natively without supplying the NTFS drivers UEFI will not be able to use the NTFS partition. It can only recognize FAT32 natively.
- EFI Partition: “create partition primary size=64”
- Data Partition: “create partition primary”
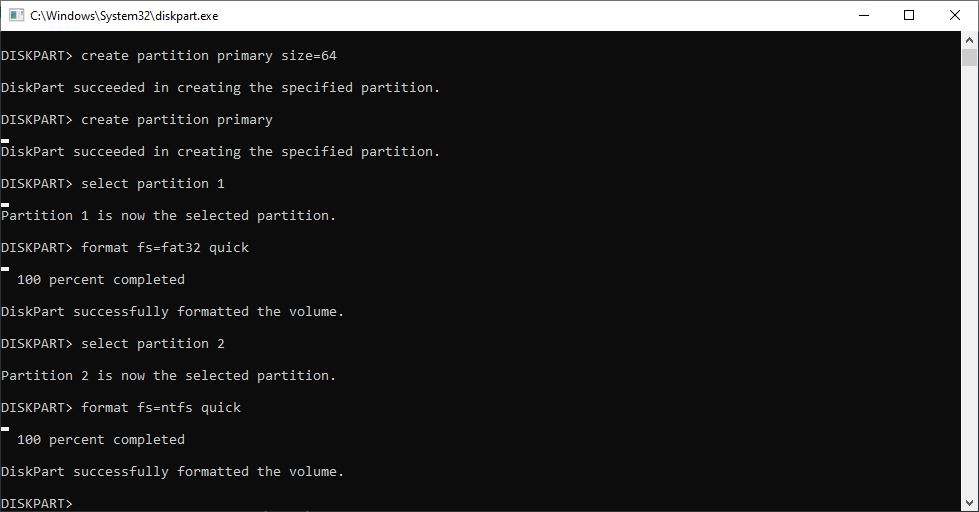
- Select first partition using “select partition 1” and format is as FAT32 file system using “format fs=fat32 quick”.
- Select second partition using “select partition 2” and format is as FAT32 file system using “format fs=ntfs quick”.
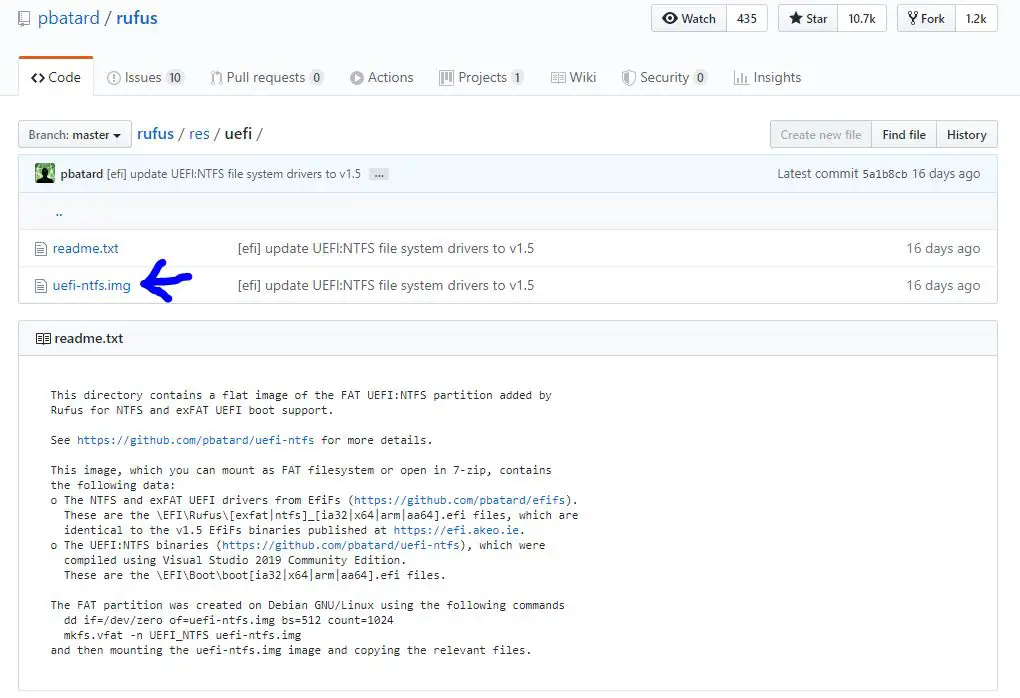
- Download the latest NTFS EFI Drivers from https://github.com/pbatard/rufus/tree/master/res/uefi. Download the file named “uefi-ntfs.img”. Extract the content of the file using 7zip and copy it to the partition 1 (64MB).
OR
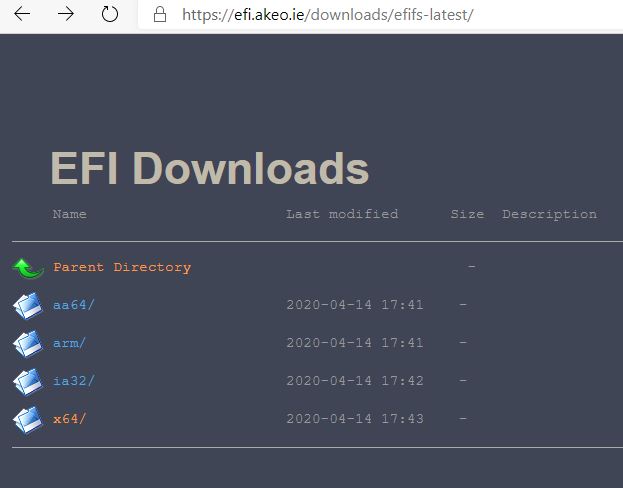
Download the latest NTFS EFI Drivers from https://efi.akeo.ie/downloads/efifs-latest/. You will find four folders there namely “aa64”, “arm”, “ia32” & “x64”. From each folder download the file starting with ntfs. We have downloaded the following files:
- ntfs_x64.efi
- ntfs_ia32.efi
- ntfs_aa64.efi
- ntfs_arm.efi
In the partition 1 (64 MB), create a folder named “EFI” on the 64MB partition and inside that folder create another folder named “Boot”. Copy the above-downloaded file in the folder.
- To exit, simply type “exit” and hit Enter. The command will close the DiskPart utility but not the CMD window.
- Now, copy all the content of the ISO image or DVD in the partition 2. You now have a GPT + UEFI (non-CSM) bootable USB drive.

Installing Windows
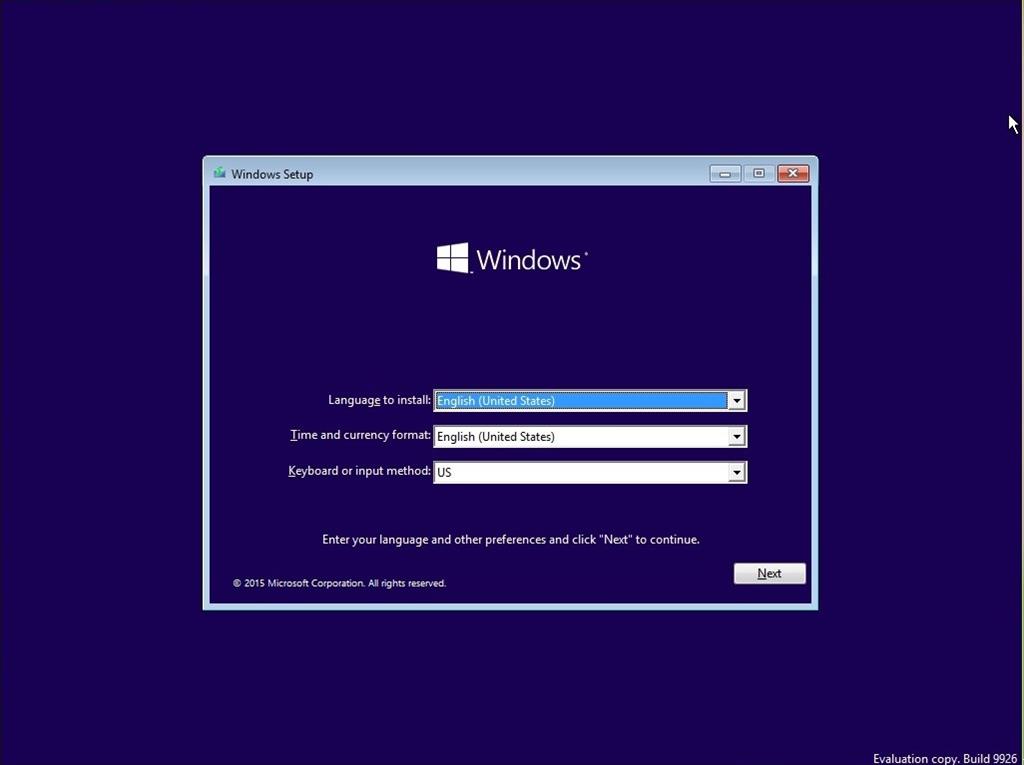
Note: If you chose the GPT option in step 7, then make sure that secure boot is disabled. You can enable it once the installation of windows is complete.
You have successfully copied the file contents of DVD into the USB drive and it is now bootable. In order to boot up a new computer, follow these steps –
- When your computer starts after powered on. Some function key (Generally F8/F12) is used to go into boot device selection. Just make sure to insert the USB drive before powering on the computer and select your drive.
- The other method which was traditionally used was to change the boot device order from the BIOS menu. For this, you will have to go to bios settings and change the boot order. (See motherboard manufacturer website for more information.)
Final Words
Having a bootable USB drive for Windows is super convenient as these days, we don’t really opt for DVD and other options. And if your PC doesn’t come with Windows preinstalled, or perhaps if you have set up your own system, setting up Windows shouldn’t be a problem if you have got the bootable USB drive ready.
We hope our instructions are well stated and clear enough for you to follow. But in case any problem persists, please comment down below and we’ll surely rectify it.

Hi Mehul,
Thank you so much for sharing this valuable post on creating bootable pendrive windows using cmd.
Thanks
We have updated the article. Please try now!
Thanks for the heads up. We have corrected the mistake.
Is it suppose to be like that or format fs=ntfs? Or is it just the same?
Superb and helpful post for me. I have been posted this article on my blog in Hindi. I like the way of your article writing and design of your blog. Thank You very Much.