If watching movies is your favorite hobby, then a Windows laptop can sometimes become a disappointment for you as compared to the Mac. Most of the Windows laptop in the Mid-Range segment comes with a crappy display and tiny speaker. There are two main components for a great movie experience – Sound and Display. Unfortunately, Windows lacks in both of them.
But you don’t need to worry about that anymore. There are some settings in Windows itself which, when applied correctly, can improve your movie experience a lot. This not only applies to movies you will also get better viewing experience while editing graphics, playing video games, etc.
In this article, We will discuss those settings in detail. We will also discuss how to make full use of the display driver of the graphics card to improve your overall experience.
So, today you will learn how can you enable the Windows Spatial Sound, Calibrate the display properly, Improve the Color accuracy, brightness and contrast right from within the Windows without using any third-party program.
Also read: List of Best Gaming Headphones this Year
Let’s dive in.
Improve Sound Settings Within Windows
Spatial Sound is a new Windows feature that can improve the overall audio experience and provide more immersive audio with few simple clicks.
Spatial Sound Settings
Spatial Sound is an enhanced listening experience in which you feel the sound is floating around you. It is basically an advanced 3-dimensional sound effect. Imagine while watching a movie and experiencing this 3D sound. If a gun is fired, you can feel the sound of the shot right beside you. Spatial sound provides an enhanced atmosphere in which traditional surround sound formats cannot.
By enabling Spatial Sound all the movies and TV shows you will watch or the games you will play will eventually sound better. Some of the games and movie shows will also have natively support for Spatial Sound. In this case, Windows will provide the highest level of audio immersion and in case of a regular surround sound, it will be automatically scaled to provide better audio.
Windows provide three options to enable the spatial sound in your system: Windows Sonic for Headphones, Dolby Atmos for Headphones, and Dolby Atmos for home theater.
Windows Sonic for Head Phones can enable games and music to play sound with amazing accuracy. It can be used with any headphones, earbuds or headsets. It makes your traditional sound more engaging and immersive. If paired with good quality headphones, this can be a blast.
Dolby Atmos can make you feel the ultimate cinema sound experience through your headphones. This technology was originally built for surround sound experience in theatres. While watching movies, you will get a realistic experience with Dolby Atmos. It can be experienced over headphones, home theaters, soundbars or TV.
Also read: How to Remove Microsoft Account from Windows PC
How to Enable them?
Now you know about the qualities of the Spatial Sound. It’s finally time to know how to enable them. Windows Sonic for Head Phones comes preinstalled with Windows. You just need to enable it and start enjoying it.
While to get Dolby Atmos, you have to first get the Dolby Access Windows App from Microsoft Store. The App is available for free. However, to enable Dolby Atmos for headphones you have to buy it for $14.99, which activates it on a maximum of 10 devices including Microsoft’s Xbox.
In case you own a laptop which already comes or advertises to come with Dolby Atmos then you can have full access for free. Now let’s move on to the steps to enable them.
Steps to Enable Spatial Sound:
- The first thing you wanna do is to connect your headphone or external supporting device such as a speaker to your system.
- Now Look for a tiny volume icon at the right corner of your taskbar and right-click on it.
- Over there, You will find the Spatial Sound option. Click on it and Select the provider you will like to use. Here you are connected to a headphone so you can choose between Windows Sonic Headphones and Dolby Atmos for Headphones.

Other Sound Tweaking Options
Other than Spatial Sound you can also do some changes in other sound settings of Windows to make it work better. Update the audio driver. For that, you have to go to Device Manager.
Simply right-click on My Computer Icon and Click on Device Manager. Now look for Audio inputs and outputs. Right-click on Speaker/Headphone followed by your Driver Provider and select Update Driver to update it.

You can also go for the third party Sound Equalizer. They come with a lot more feature such as they give you an option to set the sound according to your comfort level.
Also read: Fix VPN Not Working on Windows
Improve Display Settings Within Windows
Now coming to display. There are several ways in Windows to improve the display to get a better viewing experience.
Display Calibration Process
Type calibrate display color in the Windows search bar and click on the result that appears.

A Window will open that with Windows Color Calibration Wizard. This will guide you to adjust various display settings such as Gamma, Brightness, Contrast and Color Balance.


It will take you through a couple of different steps and let you adjust your display. It will help you to calibrate your gamma and color balance. Set these settings according to your preference.
Change Display Settings
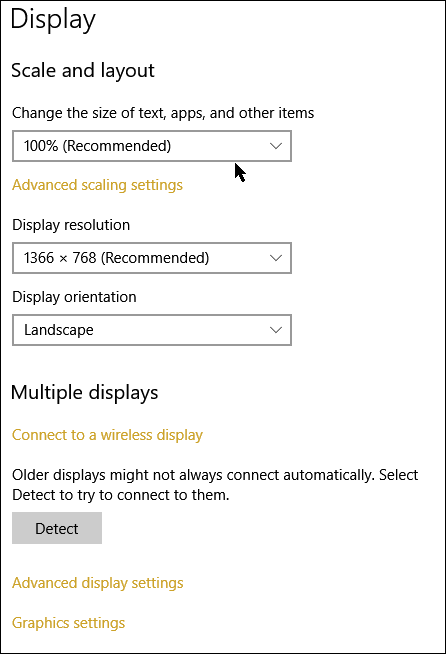
- Type display in the Windows search box and go to Display Settings.

- Here you will find a number of display setting options. You can set them according to your viewing comfort.
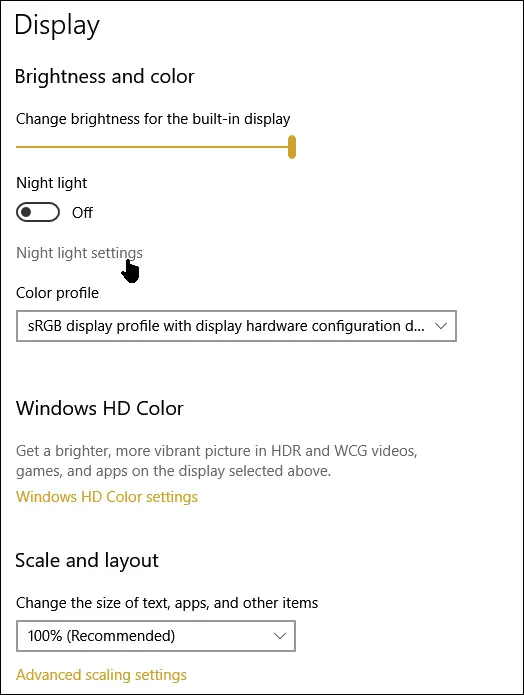
Here you can change the brightness of the Display, Turn on Night Light (Blue Light Filter), Select the Color Profile, and Enable Windows HD Color. If your display is HDR (High Dynamic Range) rated then you can enjoy HDR videos on your laptop.
Display Settings Within NVIDIA Driver
Make sure your Nvidia drivers are up to date. You can visit the Nvidia Website and Download the latest driver for your laptop. Now you have to open the NVIDIA Control Panel for this: Click on the Show Hidden Icons at the right corner of the Taskbar.
- Right-click on the NVIDIA icon and then click NVIDIA Control Panel
- Now look for Adjust Desktop Colour Settings under Display settings
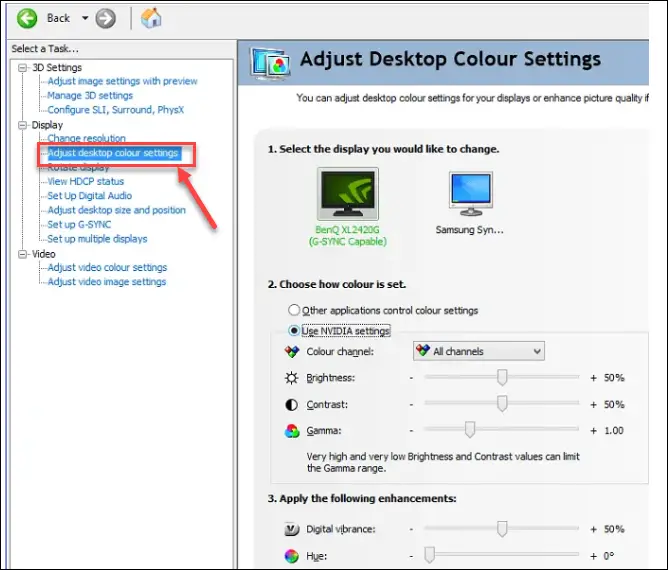
- Now it is up to you how you want to set the colors here.
For any other display driver like AMD, the process is the same. You just have to look for the Control Panel of the Display Driver. Here’s how you can do it.
Also read: Fix Windows 10 Shutdown, Sleep & Hibernate Problem Easily
Display Settings Within AMD Driver
Again make sure you have installed the AMD Radeon Software and updated the driver to the latest version. You can visit the official site and click on Download Now. Select the processor you have and the download will start automatically.
- Simply right-click on the blank space on your desktop.
- A menu will popup with AMD Radeon Software as the first option.

- Click on it and it will launch the AMD Radeon Software. Here you will find several other options you can customize such as Virtual Super Resolution and GPU Scaling.
- Click on Colors on the left-hand side.

The Color Setting menu will appear and here you can adjust the settings as per your taste. Experiment with 2 or 3 different settings and see which one suits them best.

Improving Movie Experience with Video Player
Windows default Video Player is great. Over the year it has received a lot of updates making the overall experience much better. However, they don’t fulfill most of the viewing demands. It also doesn’t support all the video formats and lacks most of the tools to let you watch the content in the highest quality possible.
There are a variety of other free and paid video players out there which can eventually enhance the movie viewing experience. They offer a wide range of features to streamline the process and allows you to do a lot more which the default Windows Video Player lacks.
Some of the best Video Players out there are VLC Media Player, GOM Player, 5K Player, Pot Player, etc. They can play almost any kind of video file you threw at them and can tweak playback quality. Using them is also not rocket science. They can also be bundled with other software using plugins and surprisingly most of them are free to use.
So, if you are not happy with the default Windows Video player then don’t hesitate to switch to a third-party one.
Conclusion
Improving the viewing experience on your Windows machine is very simple and doesn’t require some special skills. You just have to tweak some settings and that’s it.
I hope that by following this guide your movie experience on the Windows systems will improve a lot. Comment down if you noticed some changes in your display and sound experience after applying the steps of this guide.
In case you have any suggestions drop them in the comments below so we can include it in the upcoming update. You can also leave your queries below so we can help you out.
Also read: Best Windows 10 Themes and SkinPacks